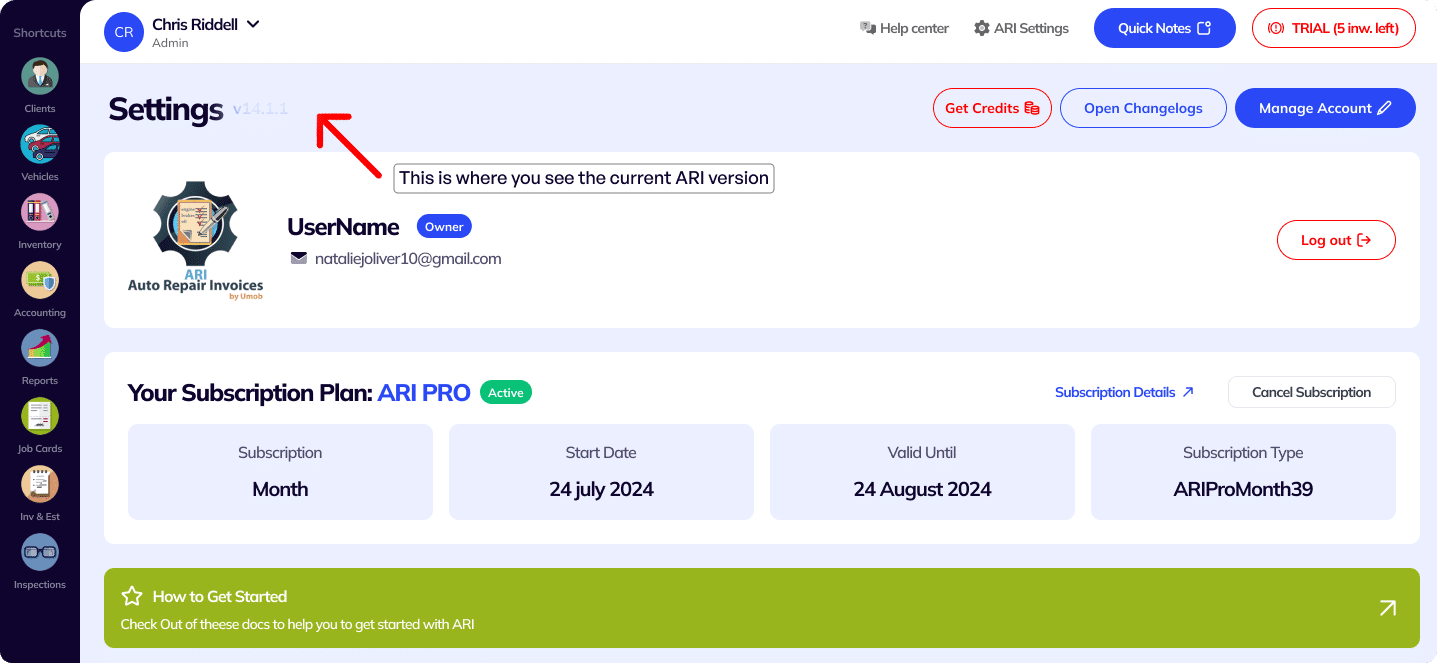
You should see this version in the Settings tab
You must ensure you keep your app updated all the time. That way you can be sure you have full access to the latest features and that ARI is running smoothly and reliably.

Open the web version from any laptop or desktop PC. For best performance, we recommend the Google Chrome browser
Access the web version of ARI here: https://web.ari.app/#views/login.html
Make sure you clear the browser cache by refreshing the page several times until the latest version loads up.

Make sure you always install ARI from the official Google Play Store.
Click on the button above to get redirected to Google Play.
If you see an Update button, it means you’re running an older version of ARI and you should update it.

Every time we roll out a new ARI version, you need to delete your current app from your Windows PC and then install the new version again from the link below.

Make sure you always download and update ARI from the use the official Apple Store. Click on the button above and Update the app if prompted.
The customer booking page now supports vehicle categories beyond standard automotive (Boat, RV / Motorhome, ATV, UTV / Side-by-Side, Snowmobile, Personal Watercraft / Jet Ski, Heavy Equipment, Agricultural Tractor, Golf Cart, E-bike / Electric Scooter). Shops opt in from the ARI Booking Settings — until then, your booking page shows the same vehicle list as before. When a customer picks a non-automotive type, the form automatically skips the NHTSA make/model dropdown (which only covers road vehicles) and hides the VIN QuickFill panel (VINs don’t apply to boats, RVs, or off-road equipment), letting the customer type the make and model freely. Existing shops that don’t enable any new types see zero change in their booking flow.
Find at: Online Booking Page > Vehicle Details Step (after enabling new types in ARI > Booking Settings > Vehicle Types)
Customers paying through PayPal can now also pay with Venmo — a familiar mobile-first option that’s especially popular with younger US customers. When your shop is connected to PayPal and your pricing is in US dollars, a dedicated “Venmo” button appears right below the PayPal button on both the invoice payment dialog and the Make a Payment page. Customers tap Venmo, approve the charge in the Venmo app or on venmo.com, and the payment lands in your connected PayPal account just like a regular PayPal transaction — no separate setup, no new processor to manage. The Venmo button only shows up when it’s actually usable (US-based Venmo-eligible PayPal accounts paying in USD), so non-US shops and non-USD invoices continue to see only the standard PayPal button with no change to their experience.
Find at: Invoices > Invoice Detail > Pay with PayPal & Payments > Make a Payment > Proceed to Payment (when PayPal is your selected processor)
You can now accept payments through Helcim directly from the customer portal. This gives your customers another convenient way to pay their invoices online, supporting credit and debit card transactions with a seamless checkout experience. When a customer clicks “Pay Now” on an invoice or makes a payment from the payments page, the Helcim secure payment form opens right in the portal — no redirects needed. Helcim processes payments securely and deposits funds directly to your connected account.
Find at: Invoices > Invoice Detail > Pay Now & Payments > Make a Payment
Added support for Square as a payment processor, giving shops and their customers more flexibility in how they pay. Customers can pay with credit/debit cards and digital wallets like Apple Pay, Google Pay, and Cash App directly from the portal. This means faster checkouts and more payment options for your customers.
Find at: Invoices > Invoice Detail > Pay Now & Online Booking > Payment Step
You can now embed your online booking page directly into your own website using an iframe. By adding embed=true to your booking URL, the page strips away the header, footer, and background image — showing only the clean booking wizard that fits seamlessly into your existing site layout. The AI chat and voice assistants remain available so your customers can still book using those features. The embedded version automatically fills the width of its container, starts directly on the first booking step, and auto-resizes the iframe height as customers navigate through each step — no scrollbars or fixed heights needed. Just copy and paste the provided embed snippet into your website and it works on any platform (WordPress, Wix, Squarespace, custom HTML, etc.). See docs/embed-booking.md for the snippet and setup instructions.
Find at: Online Booking Page (with ?embed=true in the URL)
During a voice call on the booking page, you’ll now see a real-time transcript of the conversation — both what you say and what the assistant says — displayed as chat-style captions on screen. This makes it easy to follow along in noisy environments, verify what was heard, or refer back to what was just discussed. The transcript updates instantly as the conversation flows.
Find at: Online Booking Page > Voice Assistant
The AI booking assistant is now protected so that only your genuine booking page can use it. We added an invisible, automatic verification (Firebase App Check with reCAPTCHA Enterprise) that runs in the background on the booking page, blocking automated bots and unauthorized third parties from abusing the AI service. There’s nothing to set up and no change for your customers — the chat and voice assistants work exactly as before — it simply shuts the door on outside attempts to run up AI usage that isn’t genuine customer activity.
Find at: Online Booking Page > AI Assistant
Stripe checkout now uses the correct platform key/account pairing for migrated uMOB merchants, routes session creation through the new server-authoritative checkout flow, and temporarily blocks online Stripe payments while a shop is mid-migration.
The AI cost estimator now grounds parts and labor prices in your shop’s actual regional market instead of defaulting to generic US national averages. Pulling your shop’s city, state, ZIP, and currency from your ARI profile, the estimator asks the AI to search real retailers and shops in your area — so a shop in Phoenix sees Phoenix pricing, a shop in London sees UK retailer prices in pounds, and a shop in Romania no longer sees US-dollar RockAuto prices by default. Customers see each price color-coded by where it came from (green for local market searches, orange for national-average fallbacks, blue for manufacturer catalog list prices) with a small legend explaining the colors, and a short AI note above the estimate describing what was verified. Amounts now show in your configured currency symbol instead of always $. The same regional grounding runs on the public shops page estimator when a customer enters a ZIP code, making pre-login estimates more realistic too. Net effect: the customer’s expectation coming out of the portal is closer to the real quote they’ll get at your shop.
Find at: Dashboard > Cost Estimator (authenticated) & ARI Shops page > Cost Estimator tab (public)
When a voice call ends, the booking page now automatically navigates to the step you were last working on with the assistant. This means if the call drops or you hang up, you can seamlessly continue filling out the booking form right where you left off — no need to click through previous steps manually.
Find at: Online Booking Page > Voice Assistant
When a customer starts a voice call on your booking page, the AI assistant now greets them with your shop name — for example, “Welcome to Acme Auto! I’m Ari, how can I help you today?” This gives your customers a more professional, branded experience right from the first moment of the call. If your shop name is set up in ARI, it happens automatically — no extra configuration needed.
Find at: Online Booking Page > Voice Assistant
Simplified the make and model selection experience when adding or editing a vehicle. The form now streamlines the process so your staff and customers spend less time on data entry and more time on what matters.
Find at: Booking page > Add Vehicle Details
When you turn off a customer’s portal access in ARI, the “Client Portal” button no longer appears on the invoice/estimate and inspection report pages they receive. Previously the button still showed even though tapping it only led to a login screen that turned them away — now it’s hidden entirely, so those customers get a cleaner page without a dead-end button. Customers whose portal access is still active see no change.
Find at: Invoices > Invoice Detail & Inspections > Inspection Report
Fixed an issue where the customer Payments page could load with all rows appearing blank when a shop’s payment history included records saved in different date formats (for example, mixing older payments with newer ones, or after enabling the new “Account Credit” payment type in ARI). The page now correctly displays the payment date for every record regardless of how it was originally saved, so customers see their full payment history again. Payments are also now sorted by date more reliably.
Find at: Payments
Fixed an issue on the booking page where, if today was marked as a holiday (or otherwise closed) in your schedule settings, the calendar correctly greyed out today but the time-slot panel still showed bookable slots — letting customers reserve appointments on days you weren’t open. The booking page now picks the next genuinely available date as the default selection and only displays time slots for days the shop is actually open. If no day in the upcoming year is available, the panel shows the existing “no available times” message instead of stale slots.
Find at: Online Booking Page > Select Date & Time
Fixed an issue where Square payments (especially Cash App Pay) could appear to go through on the customer’s end but never arrive in your Square account. The portal now correctly matches each shop to its own Square location, ensuring payments are routed to the right account. Digital wallet options (Cash App, Google Pay, Apple Pay) now only appear when your Square account actually supports them, preventing customers from using a payment method that won’t reach you. If you connected Square before wallet support was added, card payments continue to work as before — reconnecting your Square account in the ARI app will enable the full wallet experience.
Find at: Invoices > Invoice Detail > Pay Now & Payments > Make a Payment
Fixed a confusing error when a PayPal payment couldn’t be completed. If your shop’s PayPal account is restricted by PayPal (or otherwise unable to accept a payment at that moment), the portal now shows the actual reason from PayPal — for example, “The merchant account is restricted” — instead of the cryptic “Expected an order id to be passed” message customers were seeing before. This applies on both payment paths (the invoice’s Pay with PayPal dialog and the Make a Payment page, including the Debit or Credit Card option), so you and your customers can immediately understand why a payment didn’t go through and take the right next step. Note: this clarifies the message only — if PayPal has restricted your account, you’ll still need to resolve that with PayPal before payments will succeed.
Find at: Invoices > Invoice Detail > Pay with PayPal & Payments > Make a Payment
Fixed an issue where certain overlapping appointments could slip through the availability check, occasionally showing time slots as open when they were actually booked. Also fixed a related issue where appointments that were currently in progress would disappear from the schedule once their start time passed, even though they hadn’t ended yet. Both fixes ensure the booking calendar more accurately reflects real-time availability.
Find at: Online Booking Page > Select Date & Time
Fixed an issue where appointments booked through the AI chat assistant or voice assistant could be scheduled one day earlier than the date the customer requested. For example, a customer asking for “Monday April 13th” might end up with an appointment on April 12th. This was caused by a timezone conversion issue that affected users in certain regions. Both the chat and voice booking assistants now correctly set the exact date the customer selects, regardless of their timezone.
Find at: Online Booking Page > Chat Assistant & Voice Assistant
Fixed an issue affecting shops that enabled the new vehicle types (Boat, RV, ATV, Snowmobile, and the other non-automotive categories). When a customer asked the chat or voice assistant to book one of those types, the assistant would freeze on the “thinking” indicator and never reply, while quietly retrying the same request to the AI provider in the background. Closing the chat window didn’t stop the retries either. The assistants now correctly recognize every vehicle type your shop has enabled — including custom ones — and have a built-in safety stop so a stuck conversation can’t keep retrying. Closing the chat now also fully aborts whatever the assistant was doing. Shops that hadn’t enabled any new vehicle types were not affected, but the safety improvements apply to all shops.
Find at: Online Booking Page > Chat Assistant & Voice Assistant
Fixed an issue where the suggestion buttons (time slots, vehicle types) shown below the chat assistant’s messages were a step behind what the assistant had just said. For example: a customer would say “tomorrow at 10” and the assistant would correctly confirm “I’ve scheduled your oil change for tomorrow at 10:00 AM. Now let’s get your vehicle details” — but the buttons below would still show the time-slot options instead of the vehicle-type options the assistant had just asked for. Similarly, after a customer picked a vehicle type like “Boat”, the assistant would confirm “I’ve set the vehicle type to Boat, what’s the make?” but the vehicle-type buttons would re-appear instead of disappearing. Most noticeable on shops that haven’t configured a services list (so customers use the assistant for custom service requests). The buttons now correctly match the assistant’s most recent question, and continue to behave correctly across follow-up clarifications.
Find at: Online Booking Page > Chat Assistant
Fixed an issue where the chat and voice booking assistants would ask customers for fields you hadn’t marked mandatory in your ARI Booking Settings (e.g., transmission type, driven wheels, email, address), making the conversation longer than it needed to be. The assistants now ask only for the fields you’ve actually required and quietly accept any extra information the customer volunteers on their own — and for logged-in returning customers whose name and phone are already on file, the assistants no longer prompt for optional details like email or address either. Also fixed a related issue where the chat assistant could lose earlier answers as it collected fields one at a time — for example, after the customer gave the vehicle make, the next question for the year could silently wipe the make. Shop owners who require every field see no change; shops with a leaner required-field setup get a noticeably faster booking flow.
Find at: Online Booking Page > Chat Assistant & Voice Assistant
Fixed an issue where logged-in customers trying to book an appointment for someone else would see the name field snap back to their own name every time they tried to change it. Additionally, clicking the “Click here to book for a different person” link would trigger a “Settings Changed” popup that forced a full page reload, erasing all booking progress and requiring the customer to start over. Both issues are now resolved — clicking the link cleanly clears the prefilled contact info and lets the customer enter new details without any interruption to their booking.
Find at: Online Booking Page > Contact Info Step > “Not you?” link
New to Square? When you create your Square account through ARI, Square gives you $5,000 in free payment processing plus a $20 discount on Square hardware — applied automatically, nothing to claim. The Square page now has a dedicated sign-up section: pick your country (United States, Canada, Australia, United Kingdom, or Ireland), tap “Create a Square Account”, and sign up through the link that opens. Once your account is ready, come back and tap Connect Now to link it with ARI — your clients get a Pay Now button on their invoices, and you can add Square Terminal or the Square POS app for in-person payments. The offer is for new Square sellers; if your Square account is already connected, nothing changes for you.
Find it: Settings > Online Payments > Square (or Settings > POS Setup > Square)
ARI can now keep a running balance of money on a client’s account — like a gift card — that draws down against their future invoices. A new Credit tab on the client page shows the current balance and a full, permanent history of every credit added, applied, or voided. Add credit with the (+) button: pick a reason (a refund without cash back, a goodwill make-good, a correction, or a manual entry), an amount, and a short note. To spend it, choose the new Account Credit payment method when taking a payment on an invoice — it pays the invoice down just like cash or card, and the client’s balance updates automatically. ARI also watches for overpayments: if a customer pays more than an invoice’s total, you’re offered the option to keep the extra on their account as credit instead of leaving the invoice overpaid — and the full cash you actually collected is still recorded. When you start a payment for a client who already has a credit balance, ARI proactively offers to apply it. Made a mistake? Void any entry from the ledger and ARI appends a reversing entry, so the history always stays accurate and auditable. The current credit balance also appears on the client card next to Invoiced, Paid, and Due. Note for QuickBooks users: account credit is tracked in ARI but is not synced to QuickBooks automatically — record credit memos and applied credits there manually (a reminder banner appears on the Credit tab whenever QuickBooks is connected).
Find it: Client page > Credit tab
The Job Cards, Invoices, and Estimates pages now have an Advanced Search that finds a document by its contents — not just its name or number. Click the sliders icon at the edge of the search box and a panel opens with four toggles: Parts, Services, Clients, and Vehicles. Type a part description or part number, a service description or name, a client name, or a vehicle’s info, plate, or VIN — and the list narrows to every document that contains a match, even when that text never appears on the document’s header. Tick only the categories you want to search (all four are on by default), or tick none for an honest “pick a category” result. Advanced Search looks across all dates so an older job isn’t hidden behind the Last-30-Days filter, while still respecting your current status tab. Clear the box or click the icon again to return to the normal search box and your date-scoped list. The simple search (by name, number, status, label, and notes) is always one click away.
Find it: Job Cards, Invoices, or Estimates page > sliders icon inside the search box
A brand-new AI tool for diagnosing electrical problems on any vehicle. Pick a service or describe a custom electrical symptom and ARI returns three coordinated outputs on a single screen: a step-by-step diagnostic walkthrough (what to test, where to probe, expected reading, and what each result means); full connector pinouts and component locations (pin numbers, wire colors, function, physical location, fuse ratings, ground points); and an interactive system schematic built to service-manual standard — typically 12 to 20 nodes per circuit covering the power source, fuse boxes, relays, modules, connectors, splices, loads, sensors, and grounds, with real wire colors, gauges, and ignition states drawn on every line. Tap any block on the schematic to see its full details on the side rail. Tap “Ask Questions” on a block to drop straight into a context-loaded chat with the Repair Assistant — preloaded with that exact node, its 1-hop neighbors, and the circuit context — perfect for “how do I bench-test this relay?” or “what readings should I see across pins 3 and 7?”. Switch to Wire-Trace mode to pick any two blocks and have the shortest path between them highlighted instantly, with a hop count and an inline narrator banner that guides each tap. Zoom from 0.5× to 6× with on-screen ± controls so dense schematics stay readable on phones and tablets, and on wide desktop screens the diagram automatically lays out left-to-right — power on the left, ground on the right — so the layout doesn’t waste your screen. Every answer is cached for instant re-opens (with a Refresh Data button if you want a fresh AI run later), and a one-time “I understand” gate plus a persistent on-screen disclaimer frame the output honestly: this is AI-generated guidance, not an OEM service manual — always verify wire colors, pin assignments, and procedures against the manufacturer’s documentation before disconnecting, probing, or cutting wires.
Find it: Labor Guides > any service > Parts & Labor page > “Electrical & Wiring” button
A new Body Repair tab has been added to Labor Guides, built specifically for collision, paint, and body shops. Choose from 15 body-shop categories — Structural & Frame, Panel Repair & Replacement, Dent Repair, Paint Prep, Paint & Refinishing, Plastic & Bumper Repair, Glass, Trim & Moldings, Interior & Upholstery, Rust & Corrosion, Welding & Metal Fab, Detailing & Reconditioning, Protective Film & Wraps, R&I / Access Operations, and Estimate & Admin — each with a comprehensive list of real, billable services (Fender R&R, PDR, Quarter Panel Replacement, Tri-Coat Application, Windshield R&R with ADAS calibration, and many more). Tap any service and the AI estimator returns parts, body-shop materials (paint, filler, primer, clear, abrasives, seam sealer), and labor hours tailored to your selected vehicle — automatically factoring in construction (steel / aluminum / unibody), paint system, OEM position statements, and EV high-voltage safety requirements where applicable. Transfer items into your invoice or job card with a single tap, just like the existing Parts & Labor guides.
Find it: Labor Guides > Body Repair tab
A fifth payment processor has been added alongside Stripe, Square, 360Payments, and PayPal. Helcim offers transparent interchange-plus pricing and keeps your customers in-app during checkout — payments collect through an iFrame modal instead of redirecting to an external page. Connect your Helcim account from Settings, then accept card payments on invoices and in the Client Portal. Refunds, receipts, and connection status alerts are all supported, with loading indicators so you always know where a transaction stands.
Find it: Settings > Payment Processor > Helcim
The Square payment dialog now supports three additional payment methods alongside the existing card flow: Google Pay, Apple Pay, and Cash App Pay. All three are powered by the Square Web Payments SDK and require no backend changes — each method produces the same payment token that flows through the existing processing pipeline. Google Pay appears automatically on supported browsers, Apple Pay renders a native button on Safari (domain verified for portal.ari.app), and Cash App Pay displays a branded button with QR code support on desktop. Each method initializes independently with full error isolation — if any wallet method is unavailable, it is silently hidden without affecting the card flow. Payment instances are properly cleaned up on dialog close to support repeated open/close cycles.
See exactly how your shop is performing with a full P&L report — broken down into Income, Cost of Goods Sold, Gross Profit, Operating Expenses by category, and Net Profit. Income is split into Parts, Labor/Services, Other Income, Tips, and Discounts so you can see where your revenue comes from. COGS is calculated automatically from the parts cost on your invoices. Operating expenses are grouped by the category you assigned when entering them — no hidden consolidation. Switch between Accrual (by invoice date) and Cash Basis (by payment date) with a single checkbox. Drill down into detail tables for every income, COGS, and expense line item. Purchases are shown as a separate comparison section. Export to CSV, download as PDF, or print directly.
Find it: Reports > P&L Statement
Order parts from thousands of aftermarket, OE dealer, recycled, and specialty vendors — directly from your invoice, estimate, work order, or purchase order. Connect your Nexpart account in Settings > Parts Procurement > Nexpart, then click “Order Parts” on any document and choose Nexpart from the dropdown. The Nexpart catalog opens with your vehicle pre-selected (when a VIN is available), so you can search, compare, and add parts to your cart. When you close the catalog, your selected parts are automatically imported into the document with your preferred pricing — choose from wholesale as cost, list as cost, wholesale as price, or list as price. Core charges are added as separate line items so your pricing stays transparent. After quoting, use the “Place Order” button to send parts back to Nexpart for purchasing — order confirmations sync right back into ARI. Supports multi-vendor ordering, so parts from different suppliers are grouped and tracked separately.
Find it: Any invoice, estimate, work order, or purchase order > Order Parts > Nexpart
Create your own expense categories beyond the built-in defaults — name them anything you like and assign them to either Vendor or Employee. Custom types are stored on your account so every user on the team sees the same list. A search bar at the top of the type selector lets you quickly find any type, and you can delete custom types you no longer need. The category you assign (Vendor or Employee) is saved with the expense, so the correct vendor or employee workflow is always used — even after reopening the record or syncing with QuickBooks.
Find it: Accounting > Expenses > Create/Edit Expense > Select Type > + Add Custom Type
Accidentally deleted a client, vehicle, invoice, estimate, line item, or template? You can now get it back. Anything you delete anywhere in ARI is kept in a new Recycle Bin for 7 days before being permanently removed — with a Restore button that puts the record back exactly where it was, keeping all its original connections intact (a restored vehicle goes back to its client, a restored invoice keeps its line items and payments linked, and so on). You can also permanently purge individual records or empty the whole bin manually if you prefer. After 7 days, entries clean themselves up automatically so your account stays tidy. Every existing delete button in ARI works exactly the same as before — this safety net runs quietly in the background.
Find it: Settings > Recycle Bin
A new floating progress pill on the Home page walks you through the 10 essentials of setting up ARI — from adding your business name and logo to creating your first invoice and recording your first payment — with each item linking straight to the right screen so you never have to hunt for where to go next. Once all 10 are done, the pill flips to a gold “Pro Tips” variant with 4 bonus items (Online Booking, Payment Processor, Automated Service Reminders, and AI Labor Guides) to help you unlock ARI’s more advanced features at your own pace. Confetti celebrates each milestone, and the whole thing tucks away with a “Don’t show this again” link whenever you’re ready.
Find it: Home page > floating progress pill (bottom-left)
The “Pass fee to client” feature — already available for online payments — now works at the POS terminal too. Configure a separate fee for in-person card-present payments (Square Terminal hardware or 360Payments terminal) with its own label, type (fixed amount or percentage), and value, so you can price online and in-shop transactions independently. Before charging the terminal, ARI shows you a confirmation with the full breakdown — original amount, processing fee, tax on fee, and the final amount the customer will be charged — and the fee is added to the invoice’s Other section automatically once the sale completes. The terminal screen and printed Square Terminal receipt show the fee-inclusive total so the customer sees exactly what they’re paying. Smart recovery for interrupted sales: if a 360 sale comes back non-final or a Square Terminal poll times out, the staged fee is held until the cashier resolves it via Check Status — Approved still applies the fee correctly, Canceled rolls it back. Invoices that already have an online processing fee on them are skipped at the POS so customers are never double-charged. The settings page also includes a strengthened disclaimer covering Visa/Mastercard surcharge caps, the US Durbin Amendment debit-card prohibition, and state-by-state restrictions, plus a save-time warning when you set a percentage above 3%. Note: Square POS App payments are not yet supported in this version — only Square Terminal hardware and 360Payments.
Find it: Profile > Online Payments > POS Processing Fees
When an ARI subscription is canceled, the shop’s data stays fully accessible for a grace period as a courtesy — 30 days for new cancellations (accounts canceled before this release keep their original 90-day window). While the grace period is running, the Home page shows a persistent countdown banner with a one-tap Reactivate button, so the cutoff never comes as a surprise. After the window passes, signing in leads to a “Subscription Ended” page instead of loading the account — it explains the policy and offers a one-tap path to renew (your data is kept safe and is exactly as you left it the moment you resubscribe), a “check again” button for right after you’ve renewed, and log out. Active subscriptions, accounts inside their grace window, free accounts that never subscribed, and lifetime purchases are not affected in any way.
Find it: nothing to set up — the banner appears on Home for canceled accounts in their grace window; the lockout page only appears after the window passes
The Job Cards list view can now show the document’s Notes right in the grid, alongside columns like Labels, Vehicle, and Total — so you can scan internal notes without opening each job card one by one. Long notes wrap inside the column and line breaks are preserved, so multi-line notes stay readable. The column is off by default so existing layouts look exactly the same; to turn it on, tap the three-dots button on any column header, open Columns, and tick Notes. If you don’t see Notes in that list, your saved column layout was created before this column existed — go to Settings > Manage Account, tap “Reset Column Settings”, then fully close and restart ARI. After the restart, the Notes option will appear in the three-dots > Columns menu and you can switch it on.
Find it: Job Cards page > any column header > three-dots > Columns > Notes
– Search in JobCards, Invoices and Estimates now also allow searching by vehicle unit number
The search bar on the Estimates & Invoices and Job Cards pages can now find a record by its outstanding balance — type an amount like 250 to pull up everything with that balance due, handy for matching a customer’s payment to the right record. To keep numbers private, this only works when financial figures are visible: if you’ve hidden totals and balances from the list, searching by a balance amount is turned off too, so the hidden figures can’t be revealed indirectly through your search results.
Find it: the search bar on the Estimates & Invoices and Job Cards pages
– Faster Appointment Calendar for Busy Shops
Opening the Appointments calendar used to load every appointment you had ever booked — which could take 30 seconds or more for shops with thousands of appointments, and it happened again each time you returned to the calendar. The calendar now loads your recent and upcoming appointments by default (about the last six months and everything ahead), so it opens quickly no matter how much history you’ve built up. New online bookings from your booking page still appear automatically — nothing to refresh. To pull up older appointments, tap the search icon on the Appointments page — search now covers your entire history. A client’s or vehicle’s full appointment history still shows completely on their detail page.
Find it: Appointments page — the calendar opens faster; tap the search icon to look through your full history
– Pick a Side for Body Repair Services
Body Repair labor guides now ask which side of the vehicle the work is on. When you tap a side-specific service — like Fender R&R, Quarter Panel, Rocker Panel, Mirror, or Headlamp — a quick prompt lets you choose Left or Right; for doors, door glass, and wheel-area work it offers the four positions (Front Left, Front Right, Rear Left, Rear Right). Your choice is added to the service name and sent to the AI estimate, so the correct side’s parts come back and the side carries through onto your invoice or job card. Whole-vehicle and centered jobs — hood, roof, windshield, full refinish, frame work, and the like — don’t ask and go straight through as before.
Find it: Labor Guides > Body Repair > tap any side-specific service > pick a side
– Faster Startup for Shops with a Large History
ARI used to load every parts and labor line from your entire history the moment you logged in — for shops with years of invoices and job cards, that made startup slow and the app feel heavy afterward. Those line items now load only when a screen actually needs them (reports, the dashboard, a vehicle’s service history), so ARI starts up quickly and stays responsive no matter how much history you’ve built. The first time you open one of those screens it loads the data once and keeps it ready for the rest of your session. Opening a job card’s Parts/Labor detail rows now pulls just that one card’s items, so it stays fast on any account size. Shops with a small amount of data were never affected and will notice no difference.
Find it: nothing to turn on — ARI simply starts faster and feels lighter, especially on large accounts
Building on the startup work above, your full parts inventory list and your saved services/labor list no longer load when you log in either — they load the first time you open a screen that actually uses them (adding a part or service to an invoice or job card, the Parts Inventory or Services pages, the dashboard’s out-of-stock list, the inventory reports, or scanning a part). For shops carrying tens of thousands of parts this makes logging in noticeably quicker. The first time you open one of those screens, ARI loads the list once and keeps it ready for the rest of your session; everything works exactly as before, and your stock counts still update normally when you sell or restock. Shops with a small inventory will notice no difference.
Find it: nothing to turn on — ARI starts faster, especially if you carry a large parts inventory
When you logged in, ARI was quietly pulling each of your lists — invoices, clients, payments, vehicles, vendors, and inspections — twice at the same moment: once to show them, and again to start live-updating them. The two downloads competed for your connection and slowed down how fast the home screen appeared. ARI now loads each list once to get you to your home screen, then switches on live updating a moment later — so login feels noticeably faster and smoother, especially on slower connections. Everything still stays in sync: chat and notifications remain instant, and if another device changes a record while you’re signing in, that change is caught and shown. Smaller shops will simply notice a quicker login.
Find it: nothing to turn on — ARI simply logs you in faster
The open Job Cards list on the Home page — and the Created / WIP / Completed / Due totals beneath it — now update on their own when another device or the customer portal changes a job card. If a teammate edits a card’s parts on another device, your Home page catches up within a couple of seconds, without losing your place in the list. Completing, archiving, deleting, or converting an invoice into a job card elsewhere updates the list and the totals too. A job card you have open for editing is never disturbed.
Find it: Home page — the open Job Cards list and the totals at the bottom refresh automatically
– More Lists Update Live — No More Manual Refresh
Building on the Home page, your main lists now update on their own when another device, a teammate, or the customer portal changes a record — no need to tap Refresh. This covers Estimates & Invoices, Job Cards (including the Work Flow board, where a card slides to its new column on its own when its status changes elsewhere), Vehicles, Clients, Parts Inventory, Payments (the paid and pending totals recalculate too), Inspections, Time Tracking, and the Accounting page — its Expenses, Purchases, and Income lists each refresh live, so a teammate adding an expense, or an invoice being paid on another device, shows up on your screen within a couple of seconds. Time Tracking is especially handy across devices: when a technician clocks in or out on the shop tablet, your live Running Clocks list catches up within a couple of seconds. Your place in the list is kept, totals recalculate automatically, and a record you have open for editing — or a list you’re using to pick an item onto an invoice — is never disturbed. On a wide screen the grid views already updated on their own; this brings the same live behavior to the card/list views on phones and tablets.
Find it: nothing to turn on — the Estimates, Job Cards, Vehicles, Clients, Parts, Payments, Inspections, Time Tracking, and Accounting lists refresh automatically
The Appointments calendar now keeps itself up to date on its own — when an appointment is booked, moved, cancelled, or deleted on another device, or when a new online booking comes in from your booking page, it appears, shifts, or disappears on the calendar within a couple of seconds without tapping Refresh. Your current day, week, or month view and where you’re scrolled are kept, and an appointment you’re in the middle of dragging or editing is never disturbed. The calendar stays just as fast to open as before — there’s no extra loading behind this.
Find it: Appointments page — the calendar refreshes automatically
When you open an estimate, invoice, or job card whose saved total no longer matches its current line items, ARI now explains exactly what’s going on instead of the old generic “unsynced changes — sync to avoid data loss” prompt. It tells you whether a customer approved or declined recommended work on their online estimate, whether the record looks like it picked up duplicate line items, or whether it may have been changed on another device — and gives you clear choices: update to the new total, keep your saved total, or reload the latest. A paid invoice shows an extra warning before any change, so a finished, paid record can’t be thrown off by accident, and it no longer nudges you toward an action that could quietly double or zero out a total. The most common case — a customer approving or declining items on their online estimate — now offers a one-tap “Update total” so the figure they see is correct.
Find it: appears automatically when you open a record whose total and line items disagree
– Duplicate Line Items No Longer Throw Off a Paid Invoice
A small number of older invoices ended up with duplicate or repeated copies of their line items behind the scenes — sometimes from an older version where deleting a line didn’t always remove it — which made the total look doubled when you opened them and kept popping the “totals don’t match” prompt every single time. ARI now recognizes a paid record in this state: it quietly shows the correct saved total (what your customer actually paid) with a $0 balance instead of prompting, and displays a small “possible duplicate line items” notice so you know that record is flagged for cleanup. Just as important, routine actions on these records — marking a job WIP or completed, checking off items, changing status — can no longer accidentally save the doubled total, tax, or profit, so a paid invoice won’t flip to showing a balance due or send the wrong figures to your books. The duplicate rows stay fully visible (nothing is hidden or deleted); the underlying duplicates are cleaned up separately.
Find it: appears automatically when you open an affected paid invoice or job card
We’ve upgraded the payment infrastructure behind Stripe. If you accept card payments through Stripe, you’ll see a quick “Reconnect to Stripe” prompt — it takes about 30 seconds and one click. Your Stripe account, your history, and your payouts all stay exactly the same; you just keep accepting online payments without interruption. Nothing changes for your customers, and there’s nothing to do until you see the prompt.
Find it: Settings > Payment Processor > Stripe (or the banner on your Home screen)
Estimates now have their own customer email template, independent from the invoice one. Previously, emailing an estimate reused the invoice email — including invoice-only wording like “Balance Due”, which never made sense for a quote. There is now a dedicated “Estimate email template” you can edit on its own: open Settings > Customize Email Templates and you’ll find an Estimate row alongside Invoice and the others. The default estimate email shows an “Estimated Total” instead of a balance owed, and the rest of the message already adapts its wording to the document type. When you email an estimate, ARI automatically uses the estimate template; emailing an invoice still uses the invoice template — nothing changes there. Shops that have already customized their invoice email keep that customization for invoices; estimates simply start from the new estimate default until you customize it too. The short plain-text version of the email (used by your phone’s mail app and as a fallback) was also updated so estimates no longer list an “Amount Due” line.
Find it: Settings > Customize Email Templates > Estimate email template
You can now print the technician’s name on the customer invoice. Turn on “Show Technician Name” in Invoice Template Settings, and the default invoice template lists every technician assigned to a Part or Labor line — right below your company details — as a single line, for example “Technicians: Jack Doe, Jean Smith”. Names are de-duplicated, so a technician assigned to several lines appears only once, and a technician whose only work is on a hidden declined line is left off so the list matches what’s actually shown on the invoice. The setting is off by default, so existing invoices look exactly the same until you switch it on — helpful for shops in states that require the servicing technician to be disclosed on the customer’s invoice. Applies to the default invoice template (not custom templates) and shows on the on-screen preview, the printout, and the downloaded PDF.
Find it: Invoice or Estimate preview > Settings > Change Template Settings > Invoice Information > “Show Technician Name”
When Parts and Labor lines on a Job Card are organized into groups, you no longer have to mark them complete one at a time. Tapping “Mark as Completed” (or “Mark as Not Completed”) on any grouped item now asks whether to apply the change to the entire group — the same way Authorize, Decline, and Recommend already work for groups. Choose “Apply to All” and every item in the group flips at once and the WIP progress bar updates to match. If any items in the group have running time clocks, ARI follows up with a single prompt to stop all of them together, and then — for labor items — one combined prompt to update their invoiced hours to the tracked time, so a whole group’s worth of clocks and hours is settled in a few taps instead of dozens. Prefer to change just the one line? Choosing “No, just this one” keeps the original per-item behavior exactly as before. This removes the friction that previously made the per-item complete workflow tedious enough to avoid on grouped work orders.
Find it: Job Card > tap any grouped Part or Labor line > Mark as Completed > “Apply to All”
When “Discount per item” mode is turned on, a new Discount % column now appears in the Parts and Labor grids on Job Cards, Invoices, and Estimates — so you can enter a line’s discount directly in the grid instead of opening the dedicated part or labor editor. The column shows only while per-item discount mode is active and hides itself automatically otherwise, exactly like the Discount field in the editors. Discounted lines are now also flagged with a small tag icon in the Compact and Grouped views, placed right before the line total, so you can tell at a glance which items carry a discount. The Discount column follows the same financial-visibility rules as the Cost, Price, and Amount columns — team members without financial-data access see it masked rather than exposed. The Parts and Labor grids on the Job Card page also now stretch to fill the screen width, matching the Invoice page.
Find it: Any Job Card, Invoice, or Estimate > Discounts > “Discount per item” > Parts & Labor grid
“Discount per item” mode now covers labor, not just parts. When per-item discount mode is on, the labor editor shows a Discount% field just like the parts editor — enter a percentage and that labor line’s amount drops accordingly, the invoice’s Discount total includes it, and the final Total stays correct. It works the same on Job Cards, Invoices, and Estimates, and on read-only and printed/PDF copies. Existing labor lines are untouched (no discount means no discount), and nothing changes for invoices that don’t use per-item discount mode. QuickBooks sync was tightened up at the same time: in per-item mode, discounted parts and labor lines now sync to QuickBooks with the discount carried correctly on each line, so the QuickBooks invoice total matches what you see in ARI (previously discounted lines could sync at the wrong amount or be discounted twice). Declined lines no longer count toward the discount summary, consistent with how the rest of the invoice math treats them.
Find it: Any Invoice, Estimate, or Job Card > Discounts > “Discount per item” > Labor line editor
The Discounts screen now guides you as you use it. Picking a discount type fills in a plain-English description automatically — and the percentage option keeps it in sync with the value you enter (e.g. “A 15% discount was applied to the invoice total.”) — while a short info note under the type explains exactly how that discount is applied. The “apply discount before Taxes” switch now reads “Discount Applied Before Taxes” / “Discount Applied After Taxes” so its effect is never ambiguous. You can still type your own custom reason at any time, and choosing “No discount” now cleanly clears any leftover description. In “Discount per item” mode the “before/after Taxes” switch is now greyed out with a short note, since per-item discounts are always taxed on each line’s discounted amount. Behind the scenes, invoices with no discount no longer send an empty discount line to QuickBooks.
Find it: Any Invoice, Estimate, or Job Card > Discounts
Switching your invoice template back to default no longer throws away your custom design. When you tap “Reset to Default”, ARI now quietly saves a permanent backup of your current custom template before switching — and an amber “Restore previous custom” banner appears on the Edit Template page and the Templates picker so you can bring it back with one tap whenever you want, even months later. This makes it safe to flip between your custom design and a built-in template without fear of losing work. Resetting and restoring are also faster now: ARI no longer does a full app restart for either action — the preview updates in place and you stay right where you were. Saving a new custom template clears the old backup (you’ve committed to the new design), and the restore prompt shows the date the backup was taken so you always know what you’re bringing back. Your previous behavior is unchanged if you never reset — the backup safety net runs quietly in the background.
Find it: Edit Template page or Settings > Custom Templates > Templates > “Restore previous custom” banner
Editing a custom invoice template no longer means guessing which placeholder name to type. The Info button on the Edit Template page now opens a full reference of every placeholder ARI supports — organized into eight categories (Invoice / Job Card / Estimate, Client, Vehicle, Your Shop, Other top-level, Parts, Services / Labor, Diagnostic codes) plus an Advanced section of formatting helpers (ternaries, fallbacks, currency-and-decimals patterns). Click any code and it copies to your clipboard in its fully-wrapped, paste-and-go form — dates already include the Kendo date helper (e.g. ${kendo.toString(invoice.DatePromised, “dd-MMM-yyyy”)}), money already includes the currency symbol and 2-decimal formatting (e.g. ${myDetails.myCurrency}${kendo.toString(invoice.Total, “n2”)}), image fields (logo, signature, header banner, QR code) are wrapped in <img> tags so they render inline, and tax-rate fields already carry the % suffix. A sticky search box at the top filters by code or description (try “tax”, “vin”, or “due”) and entire sections hide when nothing matches. The two AI buttons on the same page — Import (recreate a template from an image) and Edit with AI (modify the current template in plain English) — now also see this full reference inside their prompt, instead of the small cherry-picked list they used before. So asking “add the customer’s company name next to the invoice number” or “show the Due Date under the date ordered” now produces the correct placeholder (${client.CompanyName}, ${kendo.toString(invoice.DatePromised, “dd-MMM-yyyy”)}) instead of an invented name that would silently render as empty text. The reference is a single source of truth — adding a new placeholder to the modal automatically teaches the Import and Edit AIs about it too.
Find it: Edit Template page > Info button
Typing shorthand in the parts Description column now surfaces the right inventory item even when your shorthand doesn’t exactly match the inventory name. The dropdown matches by individual words in any order, ignores punctuation differences (so “05w30” finds “05w-30”), and also searches by part number/SKU and category — so typing “engine oil 05w30” finally pulls up “Engine oil – Penrite 05w-30 Enviro+ Full synthetic” the way you’d expect, and typing a part number like “WZ436” surfaces the matching part directly from the Description field. A small grey package icon now appears next to the ID on every line linked to your inventory — freehand lines show no icon, so you can see at a glance which lines will deduct stock when you save as an Invoice. Hover the icon for a quick explanation (the wording adapts for Invoice vs. Estimate). Visible in Detailed, Compact, and Grouped views on Invoices, Estimates, and Job Cards, plus the Job Card display page. Together these fix a quiet failure mode where stock wasn’t deducting because the typed description never matched anything in the dropdown to begin with — and gives you confidence at a glance about which lines are connected to inventory.
Find it: Any Invoice, Estimate, or Job Card > Parts table > Description column
Clicking the green “Save to Inventory” (package-plus) button on a parts row now also creates the inventory link on the line itself — the grey package indicator appears next to the ID immediately, and from there on changes to that line’s quantity deduct correctly from the new inventory record. Previously the inventory record was created but the line stayed orphaned, so the indicator never appeared and quantity changes had to fall back to a description/SKU match — which could silently deduct from the wrong inventory row (or multiple rows) when more than one row shared the same description and part number. The fix also applies to the “Add Part” form’s “Also save to my Parts list” checkbox path, and to the labor version of the button. For labor specifically, if a matching service already exists in your labor inventory, the line is now linked to that existing entry (instead of just blocking the action with a “duplicate” alert and leaving the line unlinked).
Find it: Any Invoice, Estimate, or Job Card > Parts or Labor table > “Save to Inventory” button
Tapping “Mark As Paid” on a Job Card or Invoice no longer hardcodes the payment as Cash — a picker now opens with seven methods to choose from: Cash, Check, Card, PayPal, Wire Transfer, Phone Transfer, and Other. The method you pick is stored on the payment record, so dashboards, reports, and your QuickBooks sync (if connected) finally reflect what actually came in instead of showing every quick-paid invoice as Cash. If you also need to capture sub-details like a check number, card information, or a processor receipt, an “Open Payments page” button at the bottom of the picker drops you straight into the full Payments form for that invoice. Same one-tap convenience as before — just with the right method recorded.
Find it: Any Invoice or Job Card with a balance due > Mark As Paid button
Ten new vehicle categories have been added to the Booking Form so shops that work on more than just cars can finally accept the right kind of booking online — Boat, RV / Motorhome, ATV, UTV / Side-by-Side, Snowmobile, Personal Watercraft / Jet Ski, Heavy Equipment, Agricultural Tractor, Golf Cart, and E-bike / Electric Scooter. They sit alongside the existing nine categories (Passenger Car, Truck, Motorcycle, Trailer, Bus, MPV, LSV, Off Road Vehicle, Incomplete Vehicle) as opt-in checkboxes — your current selections are untouched until you decide to check a new one and save. When a customer picks one of the new categories on your booking page, the make and model fields switch to free-text instead of forcing a pick from the standard auto database, since these vehicle types aren’t covered by VIN/NHTSA lookups.
Find it: Schedule > Booking Settings > Booking Form > Vehicle Types
Invoices, estimates, and job cards now open noticeably faster. Previously the page loaded its data in a chain — first parts, then services, then payments, then images — with each step waiting for the one before. Now those fetches run in parallel, and a redundant background query that ran on every line-item load has been trimmed out. The payments lookup also reuses already-loaded data when it’s safe to do so, so opening a document no longer re-pulls your entire payment history every time. The biggest improvements show up on slower connections and on busy shops with lots of payment history. No change to what you see on screen — same data, just much less waiting.
The AI features that talk to Google’s Gemini model — Parts & Labor, Body Repair Parts & Labor, Diagnose (Cause / Correction / Instructions), Maintenance Services, Fluids, Guides & Procedures, Wiring Diagrams, the Electrical Assistant, and CarMD — now benefit from automatic prefix caching. The internal instructions sent to the model on every call are reused from a cache for a short window, so repeat or back-to-back AI requests come back faster and at a lower compute cost. Most noticeable on the larger estimator actions (Parts & Labor and Body Repair Parts & Labor). Answer quality is unchanged.
In addition to the prefix-caching improvement above, ARI now also remembers the **full** answer for an AI request and reuses it when you ask the exact same thing again — so the second time around feels instant. The cache works in two layers: the first time you ask, the AI runs normally and the answer is saved both on your device and in a shared cache for your shop. The next time you (or a teammate at the same shop) ask the exact same question for the exact same vehicle, ARI returns the saved answer in milliseconds — no spinner, no wait. On the same device the response is essentially instant; on a different device or after closing the app, it’s still much faster than a fresh AI call because it pulls from the shared cache instead of re-running the model. Cached answers refresh automatically (14 days for actions that pull live web sources, 60 days for everything else) so they don’t go stale, and any AI response that comes back empty or malformed is never saved — so a one-time hiccup can’t turn into a sticky bad answer. Per-shop pricing context (city, state, ZIP, currency) is part of the cache key, so two shops in different cities never share the same parts/labor row — regional accuracy is preserved. **What this means in practice:** the first time you click an AI button for a new vehicle/service, you’ll see the usual loading time. Click the same combination again — same instant. Open it on a tablet or another phone with the same login — much faster. New vehicle, new service, or different shop location — fresh AI call, regular speed. **Refresh AI Data button** — when a cached answer is shown on the Labor Guides Parts & Labor page (the second-and-later time you open the same vehicle/service combo), a “Refresh AI Data” button appears in the top-right of the page. Tap it whenever you suspect the saved answer has gone stale (prices look old, parts list seems incomplete, etc.) and ARI will bypass the cache, run a fresh AI call, and overwrite the saved answer with the new one — so everyone at your shop gets the updated version on their next open.
Find it: Any AI feature (Labor Guides, Diagnose, Wiring Diagrams, Electrical Assistant, Maintenance/Fluids, CarMD); Refresh AI Data button: Labor Guides > any service > Parts & Labor page (top right, when a cached result is shown)
The in-app Repair Assistant chatbot now responds 3-4× faster — most replies come back in under 5 seconds, where the previous version often took 15-25 seconds. The underlying AI model has been upgraded to Google’s latest Gemini 3 Flash, which is purpose-built for low-latency conversations while still delivering the same depth of diagnostic logic, step-by-step procedures, and follow-up suggestions. The output format is unchanged — same markdown answers, same context-aware suggestion pills, same accuracy rules around torque specs and pin numbers (the assistant continues to flag values it’s not 100% sure of and points you to the FSM for verification). Multi-turn conversations work the same way, so existing chat flows from Pro Demand, Labor Guides, and the in-app launcher all just feel snappier.
Find it: Repair Assistant chat (Pro Demand > Expert Support, Labor Guides > Ask the Assistant, in-app chat launcher)
The AI estimator now uses your shop’s city, state, and currency to pull parts prices from retailers that actually serve your area — so a shop in Phoenix no longer sees Los Angeles pricing, and shops outside the US get prices in their own currency from their own market. Labor lines now show the regional market rate for your area, so you can instantly see whether your Primary rate is above or below what local shops charge — then pick which rate to use when you Transfer Items into the invoice. Each price is color-coded by how it was sourced: green (Local market — found via a regional search), orange (National avg — generic estimate, sanity-check before quoting), or blue (OEM list — manufacturer list price). A new Total Selected card below the grid sums your selected parts and labor live as you check boxes, and an AI notes block surfaces the model’s own summary of what it validated — engine compatibility, ADAS requirements, paint system assumptions, and more. Profile combinations that conflict (such as a non-US currency paired with a US state code) are automatically corrected before being sent to the AI to prevent wildly inflated prices from currency confusion.
Find it: Labor Guides > any service, or Diagnose > Get Parts & Labor
The built-in service list under Parts & Labor has been expanded to cover common repairs that were previously missing. Most notably, front CV axles (also searchable as “half shaft” or “drive axle”) and front CV joints / boots are now in the catalog, alongside the rear options that already existed — so a search for any of these terms on a front-wheel-drive or all-wheel-drive vehicle now returns matches instead of an empty list. Other additions include rear parking aid sensors, rear sway bar (stabilizer) bushings, rear exhaust pipe / tail pipe, front driveshaft U-joint for AWD/4WD vehicles, and standard maintenance services like Engine Coolant Drain & Refill and Power Steering Fluid Drain & Refill. Pick any of them and the AI estimator returns parts and labor for your selected vehicle just like the existing entries.
Find it: Labor Guides > Parts & Labor
The Settings page has been completely redesigned for clarity and ease of use. Your account info and subscription plan now sit side by side at the top, general preferences (language, date format, currency, odometer units) are organized in clean rows, and all customization and integration options are grouped into clearly labeled cards with modern icons. Hovering a card highlights it in the matching accent color so you can quickly find what you need. Canceled subscriptions now display a red warning style so you never miss a billing issue.
Find it: Settings
The “POS Setup” tile in Settings now opens a single hub that covers both POS terminal options instead of jumping straight into 360Payments. From the new page you can see the connection status of each option at a glance — Square Terminal and 360Payments — and tap “Manage” on either to open its existing setup flow. The “Pass POS fee to client” setting also lives here now (it used to be buried inside Online Payments), so terminals and the fee that applies to them are configured in the same place. The original Online Payments page, the Square page, and the 360Payments page all keep their existing functionality — the new hub simply makes both POS options discoverable from one entry point and keeps related settings together.
Find it: Settings > POS Setup
The “Work Assigned” tab in the Employees & Salaries report now includes a “by Updated Date” checkbox. By default, the report filters by the date work was originally assigned — preventing items from appearing twice when a job card is later modified. Check the box to switch to filtering by the date the item was last updated — useful for payroll workflows where you need to see all work that was touched (e.g., marked as paid or edited) within a specific pay period. The date shown in the grid, list view, and CSV export updates automatically to match your selection.
Find it: Reports > Employees & Salaries > Work Assigned tab > “by Updated Date” checkbox
When importing parts from PartsTech or Nexpart, you can now check “Remember my selection and don’t ask next time” on the price mapping screen. ARI saves your choice and automatically applies it on future imports — no more picking the same option every time. A quick notification confirms your prices were applied, with an Edit link to clear the preference whenever you want to see the options again. Works across invoices, estimates, job cards, and purchase orders.
Find it: Any document > Order Parts > PartsTech or Nexpart > Price selection modal
The Inventory page now uses crisp, scalable vector icons instead of bitmap images — Parts, Tires, Labor, Packages, and Assets all have clean new icons that look sharp on every screen size. Tapping an item also feels more responsive with a subtle press animation.
Find it: Inventory
The P&L Statement header and metadata now stack vertically for a cleaner look on smaller screens. Tables require less horizontal space so you can view the full report without side-scrolling on most devices. Print output is also improved — styles are properly scoped so they no longer affect other elements on the page.
Find it: Reports > P&L Statement
The embeddable booking widget you add to your own website now uses a cleaner, more professional integration. The iframe automatically resizes as customers move through each booking step — no more fixed-height cutoffs or scrollbars. The embedded version also enables the AI chat and voice assistants, and includes accessibility and performance improvements. Updated setup instructions walk you through the process step by step, with platform tips for WordPress, Wix, Squarespace, and custom HTML sites.
Find it: Calendar > Booking Settings > Embed on Website tab
The AI Repair Assistant has a fresh new look and a much smarter opening. When you launch it from a vehicle, service, or diagnostic screen, it now greets you and offers a few context-aware starter questions based on what you’re working on — just tap one to send it instantly. Answers are now formatted with proper headings, bold text, and bullet lists, so part numbers, labor steps, and torque specs are easier to scan. A subtle animated “thinking…” indicator replaces the old static label, and the chat window itself got a branded gradient header, polished message bubbles, and smooth entrance animations. The Send button also got a cleaner look with an inline send icon.
Find it: Repair Assistant button on Labor Guides, Diagnose, Services, and Items pages
The online payment surcharge settings page has been reorganized — the Processing Fee Label, Fee Type, and Fee Value fields now sit side by side instead of stacked, making the whole setup easier to configure at a glance. The Fee Value input now shows a $ prefix when you choose Fixed Amount or a % suffix when you choose Percentage, so it’s always clear what you’re entering. The field label updates automatically to match your selected fee type.
Find it: Profile > Online Payments > Processing Fees
The Payments list used to show every payment as “Paid” — even after you voided or refunded it — which made it confusing to scan past transactions at a glance. Voided payments now display as “Voided” and refunded payments as “Refunded” (both highlighted in red) in both the grid and card views. Works across all processors — Helcim, Square (online + terminal), 360Payments (POS + card-not-present), and PayPal. Partial refunds leave the payment marked Paid with the reduced amount.
Find it: Payments list > Status column
The Helcim payment screen now includes a short, clear explanation below the Void and Refund buttons so you always know which one to use. Void cancels a same-day transaction before it’s batched (no fees, no charge to the customer), while Refund moves money back to the card for transactions that have already settled. A quick tip suggests trying Void first when you’re not sure — Helcim will reject it if the payment is already settled, and you can then switch to Refund.
Find it: Payment page for any Helcim-processed transaction
The Purchase Order workflow now includes dismissible “how it works” banners on the create page and context-aware “what to do next” tips on the review page (different copy for Created, Receiving, and Received statuses). The review page gains a vertical progress timeline — Created → Receiving → Received — with the date at each step, laid out alongside the vendor card on desktop and stacking on mobile. Action buttons are clearer: “Save & Continue” is now “Save Purchase Order”, “Start Receiving Process” is “Parts Arrived — Start Receiving”, and “Purchase Received” is “Finalize & Update Inventory”, each with a short subtitle. Purchase Number and Purchase Date share a row on wider screens to save space. Every banner can be permanently dismissed with a single click.
Find it: Accounting > Purchase Orders
The “Hide Declined Items” toggle used to only apply to the default invoice/estimate template — if you had built your own custom template, declined items always showed up with a strikethrough. The setting now applies to custom templates too, cleanly removing declined parts and labor from the printed or emailed document. Works in both flat and grouped views, and totals remain accurate (declined items were already excluded from the math).
Find it: Template Settings > Hide Declined Items
If you don’t track mileage — for example, you mostly work on bikes or small engines — the “Update Odometer?” prompt that appears when picking a vehicle can now be turned off. Just tick “Don’t ask again on this device” the next time it pops up and it won’t bother you again on that browser or device. You can still update mileage manually any time from the vehicle’s odometer link, and unchecking the box later brings the prompt back.
Find it: Job Card / Invoice / Estimate > select a vehicle > Update Odometer modal
The Days Off section in Booking Settings has been completely reworked. Instead of a plain list, blocked days now appear as a clean card grid — each card showing the month stripe, day number, weekday, and year, with a red “Today” badge or a muted “Past” badge so you can scan the list at a glance. Quick-add chips for Today, Tomorrow, Next Saturday, and Next Sunday block common days off in a single tap, a counter at the top tells you how many days you have scheduled, and an empty-state guide shows up when nothing is set yet. Newest days appear first, hover effects highlight the card you’re about to delete, and the layout adapts cleanly to small screens.
Find it: Calendar > Booking Settings > Working Hours > Days Off
Assigned the wrong employee to a part or labor item by mistake? You can now take the assignment off without having to re-pick yourself or delete the line. When an item already has someone assigned, opening its action menu in a Job Card shows a new “Unassign Employee” option in red, with the current employee’s name shown for confirmation. Tap it and the assignment is cleared — the “Assigned To” badge disappears immediately from the parts list, labor list, and grouped view.
Find it: Job Card > tap any part or labor item > Unassign Employee
Connecting Stripe now asks up front whether you already have a Stripe account and takes you straight to Stripe’s sign-in page, so you link your existing account instead of accidentally creating a second one. A short reminder near the Connect button reinforces this.
Find it: Settings > Stripe > Connect Stripe
The Statistics page now shows your estimate closing rate — how good your shop is at turning estimates into approved work. Under the Estimates section you’ll see three new figures: Estimates Sent (estimates you’ve sent out or had approved), Approved (the ones the customer signed off on), and Closing Rate (Approved as a percentage of Estimates Sent). It’s a quick read on your sales performance without counting statuses by hand. The figures respect the year you’ve selected at the top of the page and update when you change the year and tap Refresh. Estimates still sitting as drafts (never sent) aren’t counted, so the rate reflects only estimates that actually reached a customer.
Find it: Statistics > Estimates tab (or the All tab)
Removing a part or labor line and then doing something else on the job card — marking an item completed, unassigning a technician, or starting work — could leave the invoice still counting the price of the line you just removed, so the total no longer matched the items on the card. (Some shops saw this as “ARI deleted my items” while the total still showed the money.) ARI now recalculates and saves the total every time a line is removed, so what the customer sees always matches what’s actually on the record. Any removed item is still recoverable from the Recycle Bin for 7 days.
Find it: nothing to turn on — totals stay correct automatically
Deleting a whole invoice, estimate, or job card used to remove its line items first and the record itself last — so if your connection dropped partway through, you could be left with a “ghost” record showing a total but no items. Deletes now remove the record first and clean up the rest afterward, so an interrupted delete never leaves a total with no items behind, and any linked account credit is safely returned before anything is deleted. A deleted record’s items remain recoverable in the Recycle Bin for 7 days.
Find it: open a record > More options > Delete
When a team member’s user role has access to the company Profile turned off, they could still open and edit it through the “profile” shortcut links inside an estimate, invoice, or job card (the coupon, taxes, and recurring-charges helpers, plus the My Company Info shortcut) — sidestepping the restriction. ARI now enforces the Profile restriction on every route, including those in-form links and the Profile page itself, so a restricted user is blocked with an “Access Denied” message no matter how they try to reach it. Owners and team members who do have Profile access are unaffected.
Find it: Settings > Manage Account > User Roles — the “Full ARI Profile” permission for a role
The (+) Add credit button on a client’s Credit tab wasn’t appearing when you opened the client through the View button inside an invoice or job card — even though the page said to press it. It only showed when you opened the same client from the Clients page. The button now appears no matter how you got to the client, so you can add a deposit, prepayment, or goodwill credit right in the middle of a transaction without leaving your invoice.
Find it: open any invoice or job card > View (next to the client) > Credit tab
On the Job Cards page, switching from Grid View to Work Flow View (or back) could occasionally leave the page stuck — the board never finished appearing and clicks stopped responding — if anything went wrong while ARI was re-drawing the lists behind the scenes during the switch. The switch is now protected so a hiccup in one list can’t take down the whole page; if something does go wrong it’s recorded quietly and the view still opens. The Work Flow board also now shows the most recently arranged cards first, as originally intended.
Find it: Job Cards page > the Work Flow / Grid toggle
When you marked a date as a Day Off under Working Hours, that date could still show as available on your online booking portal — so a customer could book an appointment on a day you’d closed. This affected shops in time zones ahead of UTC (most of Europe, Africa, the Middle East, Asia, and Australia/New Zealand), where the blocked day was being read one day off; shops in the Americas were not affected. Days off you add now correctly block that exact date on your booking portal — the day shows as unavailable with no time slots — in every region. Days off you’d already saved are corrected automatically, with nothing to re-enter.
Find it: Settings > Working Hours > Days Off — blocked dates now disable booking on your customer portal
Creating or saving a Job Card, Invoice, or Estimate could freeze the page — the Save and Back buttons stopped responding and you had to reload and lose your work — when the linked client or vehicle couldn’t be fully loaded, such as a client filled in with only a name, or a vehicle whose owner record hadn’t loaded yet. ARI now shows a clear “please add a client name” message instead of locking up, and the same protection covers tapping a linked client or vehicle to view it, plus the Appointments and Inspections screens. A blocked or failed save also no longer mistakenly reports itself as “saved” or pushes an unsaved invoice to QuickBooks.
Find it: New Job Card / Invoice / Estimate — Save now completes or warns instead of freezing
When you marked a Job Card as Completed, ARI could ask “Would you like to Stop all active Clocks for this JobCard?” even when every time clock on the card was already clocked out — so there was nothing to stop. ARI now only shows that prompt when at least one clock is actually still running; completing a card whose clocks are all stopped goes straight through without the extra question.
Find it: Job Cards > open a card > change its status to Completed
When you discounted individual line items (rather than the whole invoice), the Profit & Loss Statement could leave that invoice out of the Cost of Goods Sold section — or undercount it — and show its income as a negative number, distorting your profit. The report now counts the true parts cost in Cost of Goods Sold and shows the correct discounted revenue, whether the discount was applied per line or to the whole invoice. Invoice-level discounts were never affected.
Find it: Reports > P&L Statement
– Vehicle List Column Layout Now Sticks
Rearranging, resizing, hiding, or showing columns on the Vehicles list wasn’t being remembered — every time you reopened the page the columns reset to the default. Your layout is now saved and restored automatically, just like it already works on the Clients page, so the Vehicles grid stays set up the way you like it. Vehicle photos still show correctly in the image column after your layout is restored. As part of the same update, hiding a column now saves right away on every list page (Clients, Vehicles, Job Cards, Estimates & Invoices) instead of waiting until you make another change.
Find it: Vehicles page > any column header > three-dots > Columns
Opening the Work Flow tab on the Job Cards page could freeze the entire app — eventually leaving your browser to ask whether to “wait” or close the page — for shops with a large number of job cards. The board now renders far more efficiently, and switching back to the grid view restores normal speed instead of leaving the page bogged down afterward. Shops with only a few job cards were never affected; if you ever ran into this, it should now open smoothly.
Find it: Job Cards page > Work Flow tab
Adding several photos to an inspection — especially around ten at once — could leave the app stuck on a loading spinner and force you to start over. Photos now upload reliably without freezing, even when one of the files is a problem. Photos taken on an iPhone (often saved in Apple’s HEIC format) are automatically converted so they display correctly everywhere, including the customer portal. If a picked file can’t be used as a photo — a PDF, an unreadable image, or a format that wouldn’t display — it’s now skipped with a clear message telling you how many files weren’t added and to use JPG or PNG, instead of being saved as a blank, broken image. And if you try to replace an existing photo (on a vehicle, profile, expense, material, or inspection) with an unsupported file, your original photo is kept rather than erased.
– “Mark As Paid” Works Again on Overpaid Invoices
If a customer hands over more than the invoice total — say $60 on a $55 ticket — you can record the $60 as a payment and then use Mark As Paid to log the $5 change handed back, so the invoice nets to zero and your cash drawer stays balanced. A recent update had blocked Mark As Paid whenever the balance wasn’t positive, which took this away; it now works for any non-zero balance and only does nothing when the balance is already exactly zero. Note for QuickBooks users: a negative change-back entry is not a valid QuickBooks payment, so if you sync payments to QuickBooks this kind of entry will report a sync error — record the change a different way if you rely on that sync.
When you edit a part’s Description or ID/SKU — or a service’s name — directly in the grid and type your own wording, leaving the field with Tab or Enter now keeps exactly what you typed. Before, the text could be wiped out, or the line could be replaced by a dropdown suggestion you never actually picked (for example, typing “Oil Filter” could swap the line to “Oil Filter Ford”). Choosing an item from the dropdown on purpose still works exactly as before. As part of the same fix, a line can no longer be saved with a missing description or name — so blank or “null” text will never show up on your invoices, work orders, or the customer portal.
When a customer paid an invoice online with a card (through Stripe), using the “Sync Payments” button to push those payments into QuickBooks could fail with a message saying the invoice wasn’t synced — even when the invoice was already in QuickBooks. Bulk sync now automatically links each online payment to its matching QuickBooks invoice and customer, so the payment goes through in one step. You no longer have to re-sync the invoice and then send each payment one at a time. Note: online payments are sent to QuickBooks when you run a sync (the “Sync Payments” button, or automatically right after you sync the invoice), not the instant the customer pays.
Fixed a problem where the parts and labor lines on a job card could be doubled — inflating the total — if you tapped Save and then quickly left the page before the save had finished. Saving now completes safely even if you navigate away fast, and the back arrow dims and is briefly unavailable while a save is in progress so the save can’t be interrupted partway through.
Building on the fix above, ARI now also guards against duplicate or lost line items when several actions land in quick succession — for example marking an item complete, changing its status, or assigning a technician at almost the same moment as a save. ARI now applies these line-item changes one at a time, so a fast second action can’t accidentally create a duplicate line or get overwritten before it’s saved. Nothing changes in how you work — updating items just stays consistent even when you move quickly, which especially helps on slower connections.
When you duplicated a job card that was already completed and paid, the new copy kept the original’s completed date and paid date and stayed in the Completed column — even though it was a brand-new, unpaid job. Duplicates now start fresh: the completed and paid dates are cleared, the paid status is reset, and the new card begins in the Created stage, exactly like a job card you start from scratch.
Fixed a rare data issue where labor lines on a customer invoice could render with the Hours and Rate columns blank — even with “Show Labor Hours & Rates” turned on and the line not set to a fixed rate. The root cause was that the Fixed Rate value on some labor lines was being saved as text instead of a true on/off flag, which then confused the invoice preview into hiding the columns. The labor grid editor now uses a proper checkbox (instead of a free-text input) for the Fixed Rate column, so newly edited lines always save the value correctly. The invoice, job card, and estimate templates were also made tolerant of any previously corrupted records, so they render correctly straight away — Hours and Rate reappear on the very next reload, with no need to re-enter your labor. Affects the customer-facing invoice preview, the digital invoice page, the print-out, the PDF, and the in-app job card view.
The Paid and Pending totals shown in the footer of the Payments page now sum every payment that matches your current filters, not just the rows on the visible page. Previously, when your filtered results spanned more than one page (for example, 35 payments at 10 per page), the footer only added up the 10 rows currently shown, so the totals shrank as you paged and never matched the grid’s own total at the bottom of the table. The totals also now refresh live as you type in the search box — matching how they already updated when you changed the date range.
Find it: Payments page > footer (Paid / Pending)
When you add an inventory part (or tire) to an invoice, estimate, or job card, the part’s saved Warehouse/Location value now flows through to the line item so techs can find the part on the shelf — fixed across all five add paths (single-tap, multi-select Transfer, inline SKU/description autocomplete, barcode scan, and single-tire/multi-tire transfer).
On invoices, estimates, and job cards, when an account user’s role doesn’t grant permission to see financial data, prices and totals on parts and labor lines are now properly hidden in all three view modes — Detailed, Compact, and Grouped. Previously, only the Detailed (grid) view respected this permission; switching to Compact or Grouped continued to display the qty × price line, the per-line totals, and the group totals. Restricted users now see the description and quantity (or hours), but no money figures, regardless of which view mode they pick. Applies to the in-app create/edit screen for invoices, estimates, and job cards, and to the read-only Job Card display page.
Find it: Invoice / Estimate / Job Card > Parts and Labor > Detailed / Compact / Grouped toggle
Blocked days off now display and save consistently regardless of where you (or your team) are working from. Previously, a day picked in a US time zone could be saved one day earlier under the hood, causing the scheduler to grey out the wrong day or the booking page to show availability on a day you actually meant to block. New entries are now stored at your local calendar day, and existing days off from older versions of the app are read correctly too. As an extra safety net, any day off with missing or corrupted dates is silently skipped instead of breaking the rest of the calendar.
Find it: Calendar > Booking Settings > Working Hours > Days Off
Square Terminal checkouts and refunds now use the currency of your Square location instead of forcing USD, so Canadian (CAD) and other non-USD merchants no longer get an “Invalid Currency” error.
When clicking Purchase Received, ARI now checks whether the Sub-Total matches the sum of the items. If they differ, you’ll see a quick prompt to apply the calculated totals or keep your own values — so integration-imported parts (PartsTech, Nexpart) no longer get saved with a zero or stale total.
Find it: Purchase Orders > Purchase Received
Changing the date format in Settings now actually updates how dates appear on most pages. Previously, the setting was saved but ignored — dates were always shown in the default format regardless of your selection. The setting now applies to Job Card cards, Job Card grid views, invoices, estimates, payments, statements, gate passes, work orders, purchase orders, payslips, service reminder stickers, the dashboard, vehicle history, and client pages. More pages will follow in future updates.
Find it: Settings > Date Format
A CSS issue was causing inspection checklist table styling (blue background, white borders) to bleed into table headers on other pages — now properly contained to inspection reports only.
Discounts on the Sales Tax Report and Parts & Services Report now display with a minus sign and red styling so it’s immediately clear they are deductions. Previously, discounts showed as positive numbers while the footer totals subtracted them — making it look like the numbers didn’t add up. All amounts are also formatted to exactly two decimal places, eliminating long floating-point artifacts in the totals row.
New purchase orders were always opening with PO number 001 instead of auto-incrementing from your last PO. The next number is now resolved before the form opens, no matter where you create the PO from — Accounting, Inventory, or Materials — so you won’t accidentally save a duplicate 001.
Find it: Accounting > Purchase Orders > + New Purchase Order
When a PartsTech order or connection failed, the popup sometimes showed the unhelpful text “[object]” instead of an actual reason. Errors now surface the real message from PartsTech (auth issues, expired tokens, invalid responses, etc.), or a clear fallback prompting you to retry and check your PartsTech account if the problem persists.
Find it: Any document > Order Parts > PartsTech, and Settings > Parts Procurement > PartsTech
Opening PartsTech from a Job Card or Invoice now starts with a blank search instead of auto-filling the description of whatever part was last touched. When you launch PartsTech from inside the Add-Part screen, your current part description is still pre-filled as a search keyword as before.
Find it: Any document > Order Parts > PartsTech
Typing an accidental space before or after your query (e.g. “John ” instead of “John”) used to make matching results disappear, because the filter looked for the literal space inside each field. Search now ignores whitespace at the start and end of what you type, so results stay consistent regardless of stray spaces. Applied to every main search box across the app — Clients, Vehicles, Job Cards, Invoices/Estimates, Inventory (Parts, Tires, Services, Packages, Assets, Materials), Vendors, Employees, Coupons, Labels, Time Tracking, Activities, Service Reminders, Inspections, Appointments, Payments, Accounting, Marketing, Reviews, Chats, Comments, Notes, User Roles, and the parts/items pickers.
Some invoices were failing to sync to QuickBooks with an “Object Not Found / made inactive” error. This happened on invoices that were originally synced as Estimates and later converted to Invoices in ARI — if the original Estimate had since been deleted in QuickBooks, the invoice carried a stale link to it and QuickBooks rejected the whole sync. ARI now checks whether the linked Estimate still exists before syncing and quietly clears the dead reference so the invoice goes through, with an automatic server-side retry as a safety net. Previously stuck invoices will sync successfully on the next attempt — no user action required.
Find it: Any synced invoice > Sync to QuickBooks
Purchase Orders and Expenses synced to QuickBooks were posting at their pre-tax amount — the tax, and any separate “Other” shipping/misc charge, were silently dropped, so the QuickBooks total came in short. This affected purchases and expenses with itemized line rows (and any expense without items, since an expense’s amount is stored before tax). ARI now carries the “Other” charge over as its own line, and handles tax by region: for shops outside the US (e.g. Canada) that have set a QuickBooks tax code in Settings, each line is tagged with that code so QuickBooks calculates the tax itself and records it as recoverable input tax — the same way invoices already sync; for US shops, or anyone without a tax code set, the tax posts as its own clearly-labeled line. Re-syncing a previously synced purchase or expense applies the fix automatically — no user action required.
Find it: Accounting > Purchase Orders / Expenses > Sync to QuickBooks
Appointments created on the iOS app sometimes saved with a non-zero seconds value (e.g. 10:30:02 instead of 10:30:00), which caused the desktop time picker to expose an extra seconds spinner when editing the same appointment later. Appointment times are now always saved at minute precision across iOS, Android, and web, and the date pickers no longer show a seconds field. Existing appointments heal to minute precision the next time they’re saved.
Find it: Calendar > New / Edit Appointment
Pressing Save twice (or hitting it again while the screen was still catching up) could create a phantom second appointment — usually at a random time/day and missing the vehicle and notes from the original. The Save button now visibly switches to “Saving…” and greys out the moment you tap it, so any extra taps are ignored until the appointment is fully written and you’ve moved on. The same protection applies if you use “Create JobCard”, “Create Invoice”, “Create Estimate”, or “Save Client & Vehicle” from an appointment — those actions are also held off while a save is in progress, so they can’t change the destination of the in-flight save. If your network drops mid-save, the Save button automatically becomes available again so you can retry.
Find it: Calendar > New / Edit Appointment > Save
After tapping “Select from Services” on a labor line, typing a search term, and then backing out, the labor description autocomplete on the next line could come back empty or only show a sliver of your services list — and the only way to recover was a page refresh. The leftover search filter is now cleared every time you leave the services picker (whether you back out, pick an item, or use Transfer Selected Items), so typing in the labor line always sees your full services list. Same fix applies to the Default Services tab so its list is no longer silently filtered after a previous search.
Find it: Job Card / Invoice / Estimate > Labor section > Select from Services
The inspection checklist template you chose with “Save & Use Template” was quietly reverting to the built-in 50-Point checklist every time you closed the app or reloaded the page — so new inspections kept starting from the wrong template. Your saved template now loads reliably for every new inspection, whether it’s one of your own custom templates or a built-in one (built-in templates also keep working offline). If a saved custom template can no longer be found — for example, it was deleted — ARI now tells you and falls back to the default checklist instead of silently switching it on you. And the Checklist screen now waits for your template to finish loading before it opens, so an in-progress edit can never be wiped out by a late-arriving template.
Find it: New Inspection > Checklist
Campaign sends now report what actually happened, not just what was attempted. The status column reflects the real outcome — Sent (everything went through), Partially Sent (some failed, with count and reason shown), Canceled (you stopped it mid-list), or Failed (nothing got through) — instead of always reading “Sent” no matter what. Credits are deducted only for messages that actually sent: a fully failed campaign now costs zero credits, and a 3-of-5 partial costs three credits, not five. The Sent Date column is left blank when no message actually went out, so the campaign list never claims a send that never happened. When your SMS contains a URL from a domain Twilio’s SMS gateway blocks (only links from ari.app are allowed — Google review short-links, bit.ly, and other shorteners are rejected before the message ever leaves), the per-number warning now reads “Message Blocked — your SMS contains a URL that isn’t allowed” instead of the old, misleading “format/carrier” warning. The same clearer message also shows up when sending a single SMS from a client’s profile. Email campaigns got an accuracy fix too: a hidden counting bug previously misreported the number of successful sends, which could under- or over-charge credits depending on which recipients bounced. The count now matches what actually went out.
Find it: Marketing > Campaigns
Process card payments directly from your Square terminal without leaving ARI. Pair your terminal in Settings > Square, then select Square Terminal at checkout. Payments sync automatically with the invoice.
Accept payments through the Square mobile app on your phone or tablet — ideal for shops already using Square who want seamless ARI invoicing integration.
View AI-generated parts and labor cost estimates directly inside appointment details. Transfer them into a new work order with a single tap — reducing write-up time.
Where to find it: Open any appointment created by a client via the Cost Estimator on the client portal → Cost Estimate section → Create Work Order
Choose between wholesale price, list price, or a custom price mapping when importing parts from PartsTech into an invoice or work order. Gives shops more control over markup and pricing strategy.
Where to find it: PartsTech import modal → Price options
Set a global default due date for all new invoices, estimates, and work orders. Options: Due on Receipt, Net 7, Net 10, Net 15, Net 30, Net 45, Net 60, Net 90. Individual clients can still have their own override.
Where to find it: Profile → Payment Terms
When adding tires from inventory to an invoice or work order, ARI now prompts you to add tire-related fees (e.g., Tire Levy Fee, Tire Disposal Fee) automatically. Customize the fee names, amounts, taxability, and quantity. Enable Apply automatically next time to skip the prompt on future tire additions.
Where to find it: Add a tire from Tire Inventory → Tire Fees popup
Grouped items on printed invoices and PDFs now display the actual group name (e.g., “Brake Job”) instead of the generic “group total” label. A Hide Group Names toggle is available if you prefer the generic label.
Where to find it: Invoice Template Settings → Hide Group Names
Zoom in and out on invoice and work order previews using floating controls at the bottom of the screen. Zoom resets automatically before printing or PDF generation to ensure clean output.
Where to find it: Invoice or Work Order preview → Zoom controls (bottom of screen)
Convert a photo of an existing paper invoice into a fully editable ARI template. Upload an image of your current invoice and AI will recreate the layout — including placeholders for company info, customer details, parts, labor, and totals. Review and fine-tune in the editor before saving.
Where to find it: Invoice Template Settings → Edit Template → Import
Describe changes to your invoice template in plain English and AI applies them. For example: “make the header background dark blue” or “increase the company name font size.” Supports multi-level undo to revert any AI-applied change.
Where to find it: Invoice Template Settings → Edit Template → Edit with AI
Customize the appearance of inspection reports: header colors, section colors, checklist table colors, text font, text size, text color, logo visibility and size, company name size, and disclaimer. Changes apply to all inspection previews, PDFs, and printouts.
Where to find it: Open any inspection → Settings button (header)
Build a custom waiver or authorization form with checkboxes and text fields that appears on invoices, estimates, and work orders. Customers can authorize repairs, acknowledge terms, or fill in notes — with optional signature collection. Signed forms lock all fields to protect the integrity of the agreement. Deleting the signature unlocks the form for updates before re-signing.
Where to find it: Profile → Payment & Other → Custom Disclosure Form
Quickly populate state-required legal disclaimers and disclosure form fields with one click. Supported states: Florida, California, Illinois, New York, Michigan, Virginia, Ohio, North Carolina, and Massachusetts. Also includes general-purpose presets for Repair Authorization and Non-OEM Parts Disclosure. Presets are additive — apply multiple to cover all applicable requirements.
Where to find it: Profile → Payment & Other → State Compliance Presets
ARI now includes a formal Accessibility Conformance Report (VPAT) documenting compliance with WCAG 2.1 and Section 508 standards. Useful for shops with government contracts or fleet customers that require accessibility documentation.
Filter time logs by date range — Last 7 Days, Last 30 Days, This Month, or a custom range. Filter selections are remembered between visits.
Where to find it: Time Tracking → Time Logs tab
AWD (all-wheel drive) and 4WD (four-wheel drive) are now available in the vehicle drivetrain dropdown.
Where to find it: Vehicle details → Drivetrain
The AI estimator now verifies its answers against real-time web data before responding. Part numbers are checked against real parts catalogs, labor times are cross-referenced with industry sources, and vehicle specs are validated against manufacturer data. This means more accurate estimates, more realistic pricing, and fewer made-up part numbers.
Where to find it: Labor Guides > Parts & Labor, Diagnosis > Parts & Labor
Rapidly tapping Save on a payment could create duplicate payment records. The button now disables after the first tap and re-enables only if an error occurs.
Discounts were not correctly subtracted in tax reports. Discounts are now properly reflected in all tax report calculations.
The profit section on the dashboard was not displaying values. Profit now calculates and renders correctly.
Inspections were not attaching to invoices that used custom templates. They are now properly linked regardless of template type.
The reports grid failed to initialize correctly when reopened, and exports could fail in certain scenarios. Both issues have been resolved.
Appointments were displaying as 30-minute slots on small screens instead of their actual duration. The scheduler now renders the correct duration on all screen sizes.
Downloading reports was failing in certain scenarios. Downloads now work reliably across all platforms.
Typing a search term and then changing the date range silently cleared the search — showing all records even though text remained in the search box. Search is now preserved when adjusting dates on all pages: Invoices, Estimates, Work Orders, Payments, Inspections, Accounting, and Time Logs.
Opening a work order with no groups could display group names left over from a previously viewed work order. Group names are now properly cleared when switching between documents.
The grouping array was not fully resetting in certain scenarios, causing leftover group data to appear on new work orders. It now clears correctly every time.
Hyperlinks in disclaimer text were not rendering on invoices. HTML anchor tags (e.g., <a href="yoursite.com">click here</a>) now render correctly in both disclaimer fields.
Pressing Enter after typing in a checklist item’s details field on iOS caused the page to jump to the top. The page now stays in position so you can continue editing nearby items without losing your place.
Grouping can be done in the Grouped tab.
Added an improved drag-and-drop functionality.
Option to move items within groups using a dropdown (ideal for small devices).
List view / Grid view inside Grouped tab:
-Grid view → best for drag-and-drop.
-List view → best for sorting items inside groups.
-Groups and item order are persistent (remain after refresh).
Note: Sorting may not work well on older JobCards (new logic applies only to new JobCards).
Adding Canned Jobs to a JobCard automatically creates a new group for that package.
-Reminder to update vehicle mileage when:
-The vehicle is selected but has no mileage, or the last mileage update was more than 30 days ago.
-Expandable labor description field in the Detailed table.
-Total hours added to the footer of the Detailed table.
JobCard is automatically marked as Completed when the invoice is marked as Paid.
-Option to add free text when sending invoices via email.
-Moved VIN and license fields to the top.
-Added VIN detection from images (e.g., door jamb sticker).
-Quick filters: Selection persists locally (e.g., change filter on JobCards, restart ARI, filter is saved).
-Home tab selection: Chosen tab (e.g., Custom) persists after restart.
-Language selection (BETA): Select a language in ARI Settings → Language (Google Translate dropdown).
-Restarts in the chosen language (still in progress).
-Uses the latest state-of-the-art AI models (slower, but more accurate).
-Warning shown if vehicle details are incomplete.
-When transferring labor items to a JobCard, users can choose between:
-Generated AI rates, or User default rates (defined in Profile).
Invoice Enhancements
-Added engine details to the default invoice template (can be hidden in settings).
-Added option to import vendors (ARI Settings → Import Data → Vendors).
QuickBooks Integration
-Send ODO, VIN, and unit with invoices.
-New option for QuickBooks tax mapping (Settings → QuickBooks, requires connection).
-New option to support non-SSH connections (for providers like GoDaddy, ProtonMail, Outlook, etc.).
-Option to save client and vehicle directly from online appointments (More → Save client).
-Client name is now exposed in Reports → Parts & Services.
-“View All” from Home now shows archived JobCards as well.
-Fixed Parts category filter.
-Order button added to all tabs (Detailed, Compact, Grouped).
-Visible only when connected to PartsTech.
-Fixed issue where notifications didn’t show on accounts with lots of data.
-Fixed scrolling issue on the Edit Labor page.
-Reduced font size on smaller devices.
check on taxes was not working and fixed an issue with the calendar scrolling on mobile devices.
typeof name being undefined in employee and other records.parseFloat.display:none has been removed from all modal views in the index, and invisible:vendorsExist has been removed from various files to ensure elements are visible when needed.
mySignExist, myLogoExistNow it work correctly.views/signature.html placeholder issue has been fixed.id:null Values have been replaced with "".isEdit flag has been fixed, and the Delete button is now hidden when adding a new vendor.typeof name != 'undefined' Issues have been fixed, picture deletion on employee deletion is now enabled, and text notes have been corrected. Warnings for unsaved changes have also been added.[object Object] has been fixed by removing the item string from the model.DateOrdered to jobCardCreatedAt on the dashboard.calculateOtherValueCost error has been resolved.typeof undefined The template for Profile/Vendors has been fixed.diffMonths has been implemented for fractional next service calculations.BUG in purchase where items saved as [object Object] has been fixed.Primary Payment Processor switch has been fixed.POS, PartsTech, and Labor Guides links and error displays have been resolved.getCorrection not working due to escaped \n from JSON has been fixed.getLabor and parts buttons on the 3Cs table are now correctly positioned.appointmentLinkView now correctly hides send via text/social media if not in AppCordova.Transfer items functionality has been fixed.Taxable items now map properly.priceCDN is no longer incorrectly used for cost when transferring from Prodemand.Add to inventory now works.QB auto-sync now works when saving an invoice only.damagePicBase No longer incorrectly shows after the first save of damage if the inspection save is canceled.redirectToMDHistory Was updated for CarMD.24/7 Customer Support
Contact us via email at contact@ari.app, and we will reply promptly.
ARI Video Guides
ARI's official video library with all of the guides you need
ARI (Auto Repair Software) © 2026 | by uMob.ltd
800 N King Street
Suite 304 -1249
Wilmington, DE 19801
The Capterra logo is a service mark of Gartner, Inc. and/or its affiliates and is used herein with permission. All rights reserved.
Add clients, vehicles & all the details that are relevant to them
Create detailed inspections with checklists, damage reports
Manage your parts, tires, business assets, and all other important items.
Track labor progress, start & stop work clocks, approve & deny services.
Create professional quotes for your auto repair clients
Generate professional invoices for your auto shop’s clients
Generate damage reports & attach pictures to your auto inspections
Let your clients book your services online from the comfort of their home
Earn return customers by reminding them when service is due
Create purchase orders, track your expenses, and monitor your profits
Read Engine Error Codes with ARI monitor car’s parameters live
Reports for your business performance & export the data
Never miss a payment keep an eye on your invoice billing process
Reach your core customers & market business across different channels
Manage vendors, partners & orders for a streamlined repair experience
Monitor and label the activity of multiple employees
Receive payments on your Online Invoices with the world’s most renowned payment networks
Order parts easily with PartsTech and ARI! Smooth and reliable parts procurement process.
Every mechanic benefits from quality Repair Guides and Car Repair Estimates.
Get Service History Instantly. Decode VINs and Plates with Accurate Data from a Leading Supplier.
Get Diagnostic & Maintenance Info. Access Diagnosis, Solutions, and Problem Predictions.
Sync ARI invoices to QuickBooks Online. Manage customers and inventory.
Get detailed labor guides, labor times, and estimates from the world's first AI labor guides system.
Process In-Person Payments On The Spot. Geared towards auto repair businesses.
ARI has partnered with Wisetack to offer your clients extra payment options for auto repair services.
Order auto parts through Nexpart without leaving ARI — a faster, more reliable way to source what your shop needs.
You can access ARI on all major digital platforms.
A complete guide to setting up and running your auto repair business
ARI’s client portal lets clients easily stay informed when they visit you
How to add multiple users to your ARI Profile
You must ensure you keep your app updated all the time
ARI offers features and settings tailored for auto repair services
Welcome to ARI's blog for updates, articles, and guides
Here are our most notable achievements over the years.
Get the most out of your client management with our online documents
Test the features and see if it’s the right fit for you
Welcome To ARI's Official Video Library
Earn rewards and ARI credits by referring our app to friends