One of ARI’s commonly used features is the Expenses section in the Accounting module. Today we will show you how to create, edit, and delete expense records for your auto repair business.
1. Creating an Expense
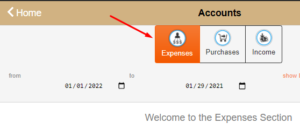
After login, head out to the Accounting module by pressing the icon on the home page ![]()
You should be presented with this view. Click on the Expenses tab
After that, press the + button to start a new expense. You should now see this form.
Fill up the form by selecting a type of expense, a vendor, and the amount owned. If you don’t have vendors created, then you can create one by pressing the + button while on the Vendor page!
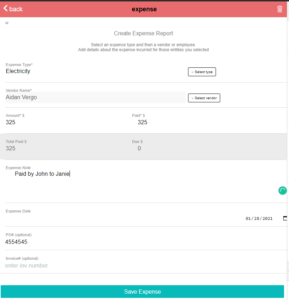
Make sure you check the info one more time and then click Save
2. Edit Expenses
Although not advisable, sometimes you may need to edit an expense in case you made an error or the payment values have been changed. If that’s the case, all you have to do is click on the Expense in question, make the edits, update the date (optional), and then Save
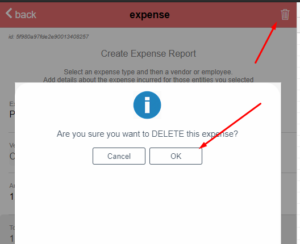
3. (NEW) Delete an Expense
This feature has been implemented recently. Deleting an expense is pretty straightforward. Open the estimate and then click the Trash icon. Confirm the deletion and you’re done!
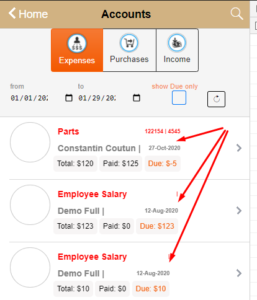
4. Search & Filter Expenses
Filtering
To filter your expenses, select the From and To dates and then click the Refresh icon ![]()
Searching
Simply click the search icon on the top of the screen and then type in your search query. You can search by vendor name, expense id, invoice number, PO number, and expense type.
5. Download Expense Reports
If you need me info about your expense, you can download an expense report that contains all the data necessary for you to post-process it. This data might be needed by your accountant or simply for your own end-of-month reports.
To download an expense report, head on to Reports from the Home screen and then click on Income and Expenses button. Select the timeframe, hit refresh until you see the results, and then click Download.
Conclusion
We hope you found this walkthrough useful. Let us know if you have any feedback!
[ia_button id=”button_47″ size=”small” solid=”0″ link=”https://ari.app/auto-repair-software-price/” icon=”” arrow=”1″ target=”” color=”#” css_animation=”” animation_delay=””]Still on Trial? Check ARI Pricing[/ia_button]