ARI’s(Auto Repair Software) newest version comes with a complete redesign of our appointments page.
The main points we will discuss in the article are:
- What are the fundamental changes to the online bookings page, and how does it compare to the previous version
- How you can set up your online bookings page
- How to configure your work hours and list your services
- What customization and editing options you have
- How to share the online booking page with your customers
- More information about the version update
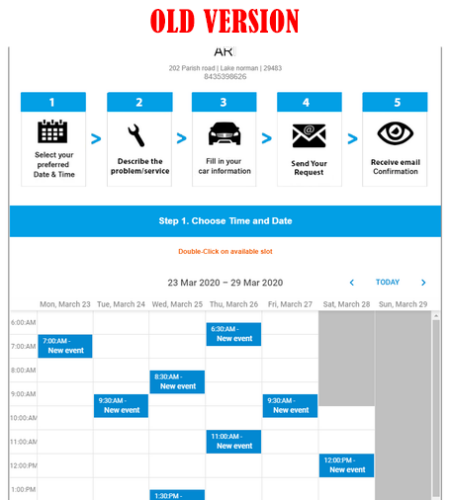
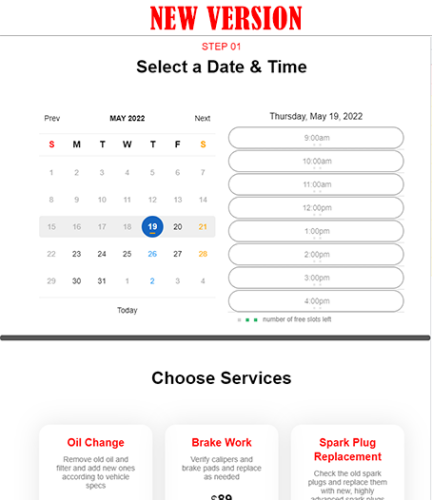
Your customers can now enjoy a completely different online booking experience. ARI- Auto Repair Software‘s latest update allows your clients to see your work hours, available repair slots, and provided services. The design is simplified, and it lets people make appointments at your shop with a few button clicks. Here’s a visual comparison to put things into context:
How to set up your online appointments page?
Before using the online appointments functionality – you will need to confirm your e-mail from the “Appointments“ menu. Once you do that – our system will register that your e-mail is confirmed, and you should start receiving booking notifications there.
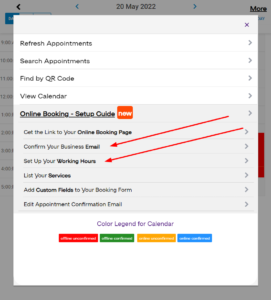
After you are ready – you can start configuring your working hours. The way to do that is from the “Appointments“ view when you click on “More” and go to the “Setup working hours” page. From there, you can add your work schedule, holidays, and how many appointments you can take in a timeframe. Additionally, you can choose to enable half-hour appointments or block short-notice appointments.
Listing your services and customizing form fields
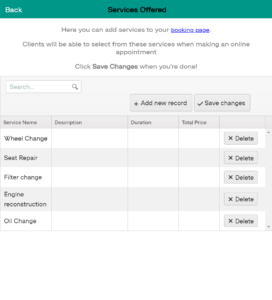
You can list your services from the “Appointments“ view by clicking on “More“ and selecting “List your services“. On this page, you can enter the services you want to display in your online booking form. Once you complete your list – click on “Save changes“ to complete the record.
You can write descriptions for each of them, and choose a service duration and a total price.
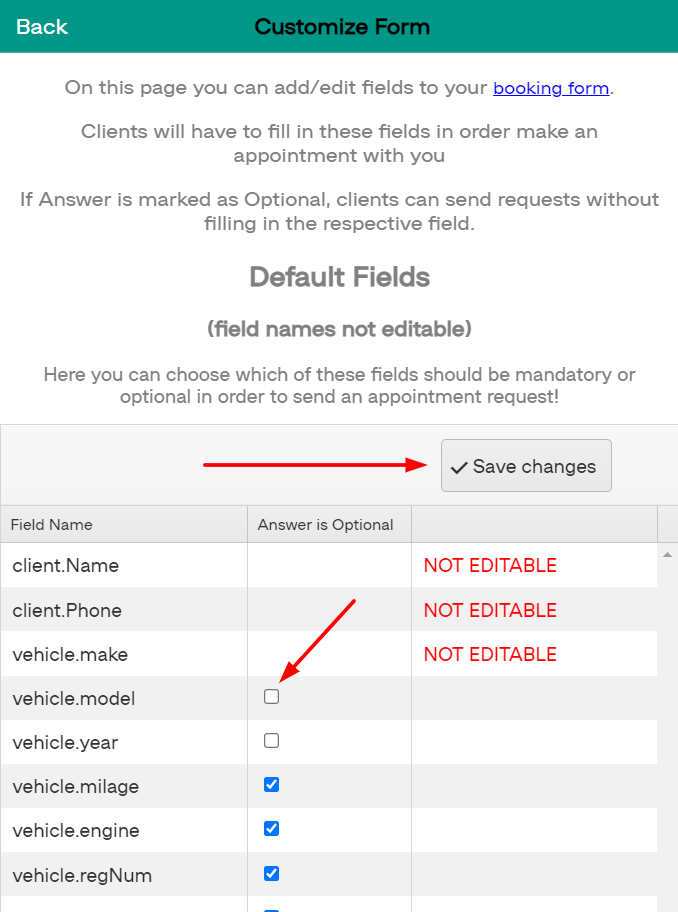
From the section “Add custom fields to your booking form“ you can choose what information your clients need to enter in your booking form. There you will see the default and custom fields that have a mandatory and an optional state.
A box with a tick means the option is optional. If the box is empty – the option is mandatory. The fields “client.name“, “client.phone“, and “vehicle.make” are not editable in our auto repair software.
Additional editing options in our auto repair software
You can make changes to the e-mail your clients receive after a confirmed booking in the “Edit appointment confirmation e-mail“ section. Besides, you can choose to automatically confirm all new appointments when you receive one from your clients.
You can also switch back to the old calendar view if you need time to adjust to the new design. Moreover, it’s possible to create appointments straight from the calendar in the “Appointments“ view. But you will need all relevant customer and vehicle details. Additionally, you have the option to change the appointment hours by dragging the calendar event or double-clicking to edit it.
*whenever you see a small red triangle on the top right of a section – this means there are some unsaved changes.
Sharing the booking form with your customers
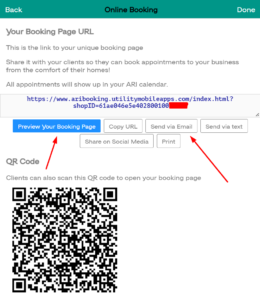
Once you finish customizing your booking form – it’s time to send it to your clients. Open “Appointments“ -> “Get a link to the online booking page“ and see what the form looks like. Then copy the link, and share it via text, e-mail, or social media. Or print it and place it so your clients can see it.
You can also scan a QR code that opens up the online booking form or embed an HTML snippet on your website that leads to it.
We advise you to test the booking form before sending it to your customers and check if it includes all the details and services you want people to see.
What does the customer’s online booking journey look like?
We made sure the customer experience for your clients will be as intuitive as possible. The first thing they see is your company name, logo, and booking calendar. After they choose a time, date, and service for their vehicle – they need to give you some vehicle info and appointment details to continue. The last step is to provide you with contact details so you can confirm the booking and they can receive an e-mail notification.
ARI (Auto Repair Software) V.9.9.7 is active – take a look at the other updates
The online booking calendar redesign is part of our recent app update.
Please check if you are running the latest version of our software by following this guide
Aside from the changes to the Appointments section – here are the other important changes and bug fixes:
-
- Inspection ID auto increments when a new inspection is added.
- Inventory is updated whenever you delete a part from an existing invoice.
- Printing long invoices on multiple pages.
- Attaching Inspections to Job Cards.
- Creating Job Cards and Estimates from the Appointments menu.