Here’s what’s new in the Appointments section of ARI
As of ARI V9.6.5 there are a few changes that should make your job as an auto repair service provider much easier. Make sure you update your app to the latest version before you proceed with this guide.
Most important changes in the Appointments feature of ARI
1. QR codes for all online appointments
Starting with ARI V9.6.5, every appointment made online, by your clients, using our online booking system will also generate a QR code.
The final booking page will look like this on the client’s end.

If a client comes to your shop with this QR code, all you have to do is
- log into ARI on a mobile device (needs camera)
- go to Appointments
- click More (upper right corner)
- tap the Scan QR Code Appointment
- scan the QR code with your camera
If the scanning was successful, then you should see the client’s appointment on your screen.

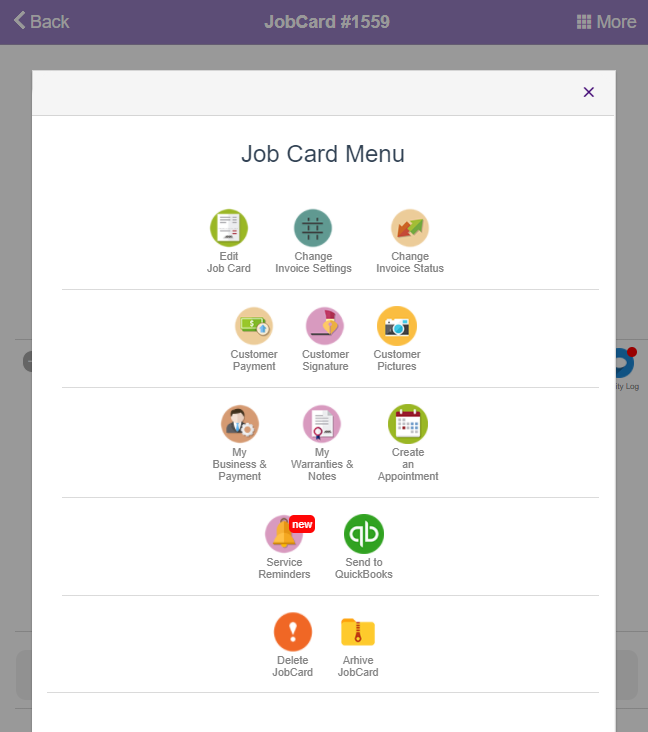
2. Create Appointments from JobCards
This has been a long-requested feature and we’re happy to say that we finally got the chance to implement it. You can now create an appointment straight from the JobCard menu. The client, vehicle, and invoice/estimate data will automatically populate into the new appointment.
This is useful in cases when you create Estimates. Once the estimate gets approved by the client, then you can simply book that entire job right into your calendar.
Here’s how to create an appointment from the JobCard menu
- go to JobCards page
- open up an existing jobCard
- click the More button (upper right corner)
- tap the Create an Appointment
- select the time and date you want to book the client
- verify and Save the appointment
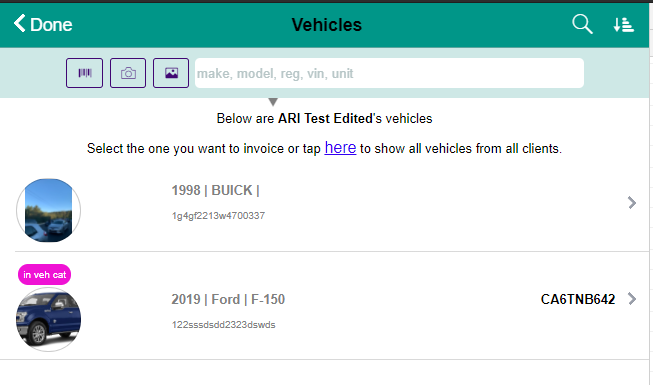
3. Show Vehicles associated with the selected Client
Just the same as with JobCards, from now on, when you select a Client in the Appointment section, the system will automatically filter down only the Vehicle associated with that client. This should make it much faster to create an appointment.
login -> Appointments -> add new Appointments -> tap to Add a Client -> tap to add a Vehicle
4. Show Clients associated with the selected Vehicle
Obviously, the same applies backward. If you select a vehicle first and then add a client, the system will display only the associated owners first. This way, you won’t have to search for the client manually
login -> Appointments -> add new Appointments -> tap to Add a Vehicle -> tap to add a Client
5. Search functionality
You can now search through your appointments by client name or vehicle registration number. All you need to do is open the Appointment section, go to More, and tap on the Search Appointment button. Input the client name or car’s registration number to pull up the respective appointments.
We hope you find these updates useful. If there is anything else you’d like to see in your auto repair software, don’t hesitate to contact us.